
How to Install the YourGPT Chatbot on WooCommerce?
Option 1: Use the WordPress Plugin (Recommended)
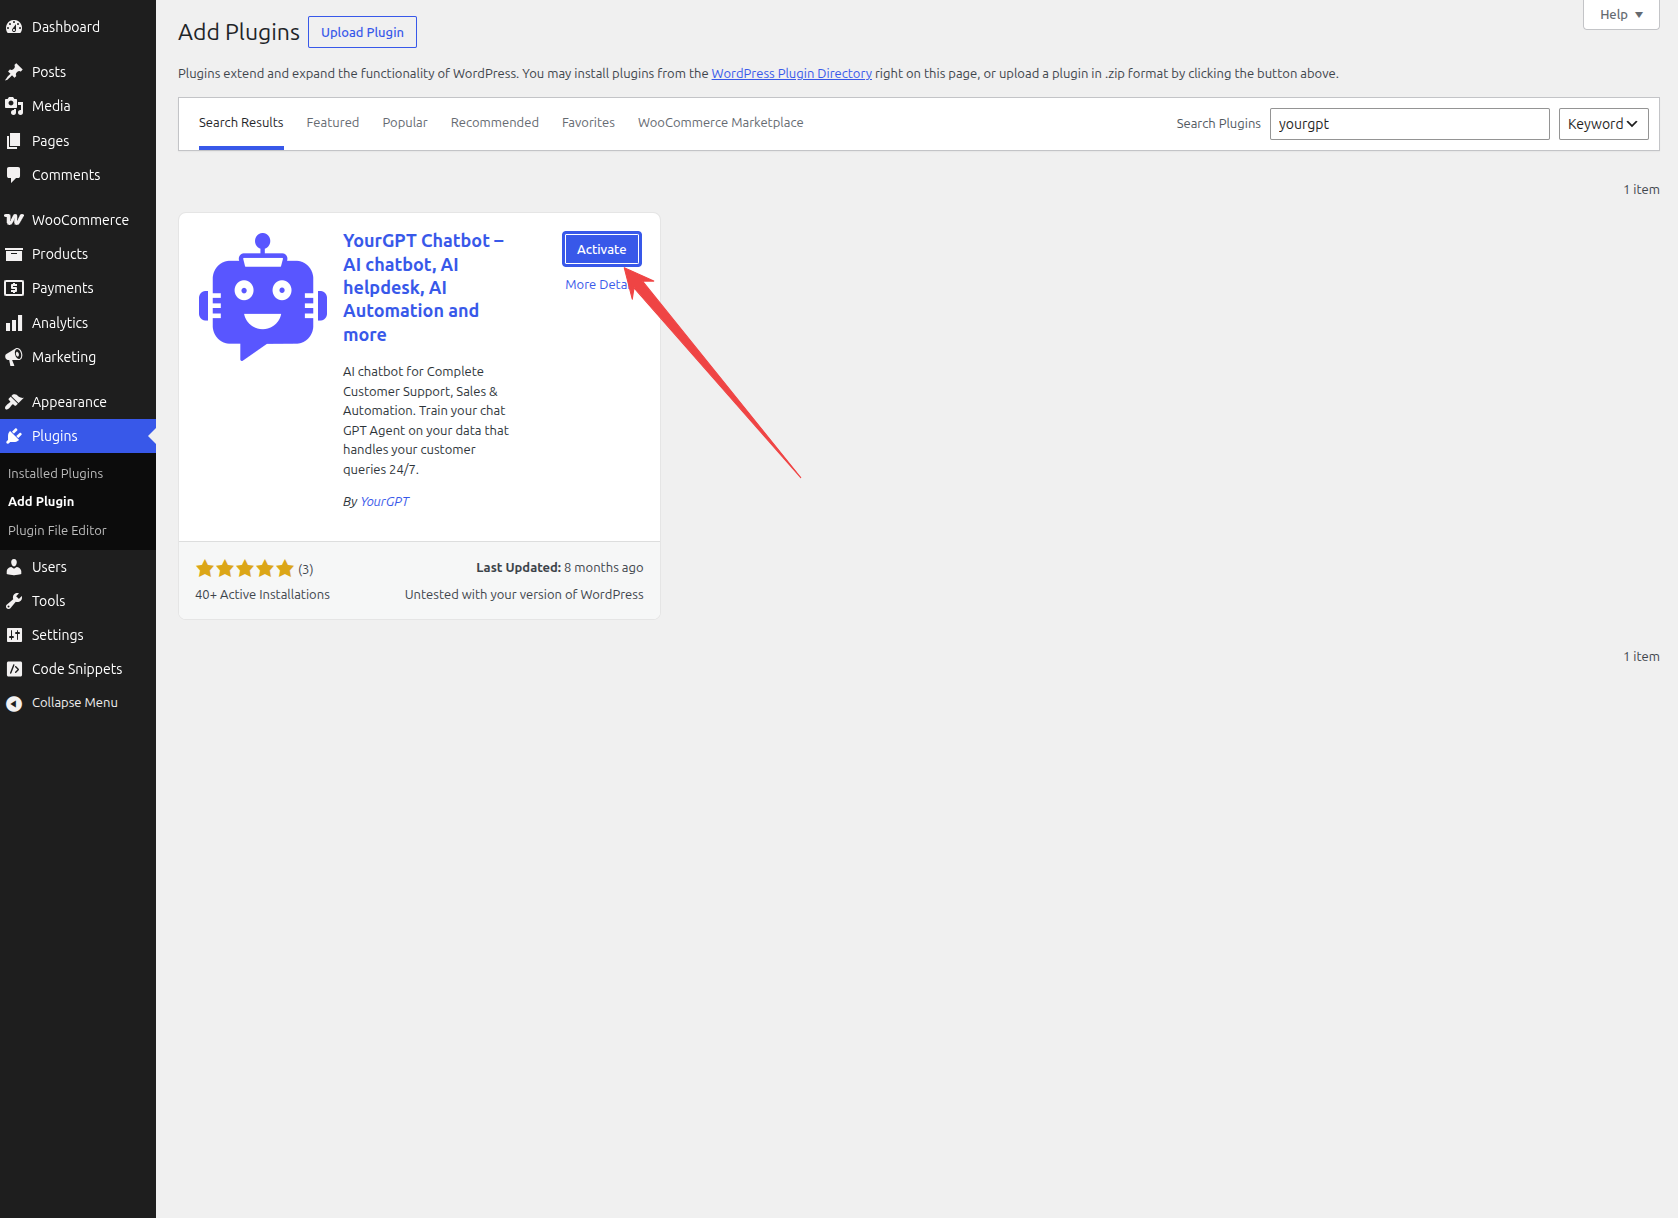
In your WordPress admin, go to Plugins → Add New and search for YourGPT Chatbot. Install and activate it.
Then go to Settings → YourGPT Chatbot, paste your Widget UID, and save.
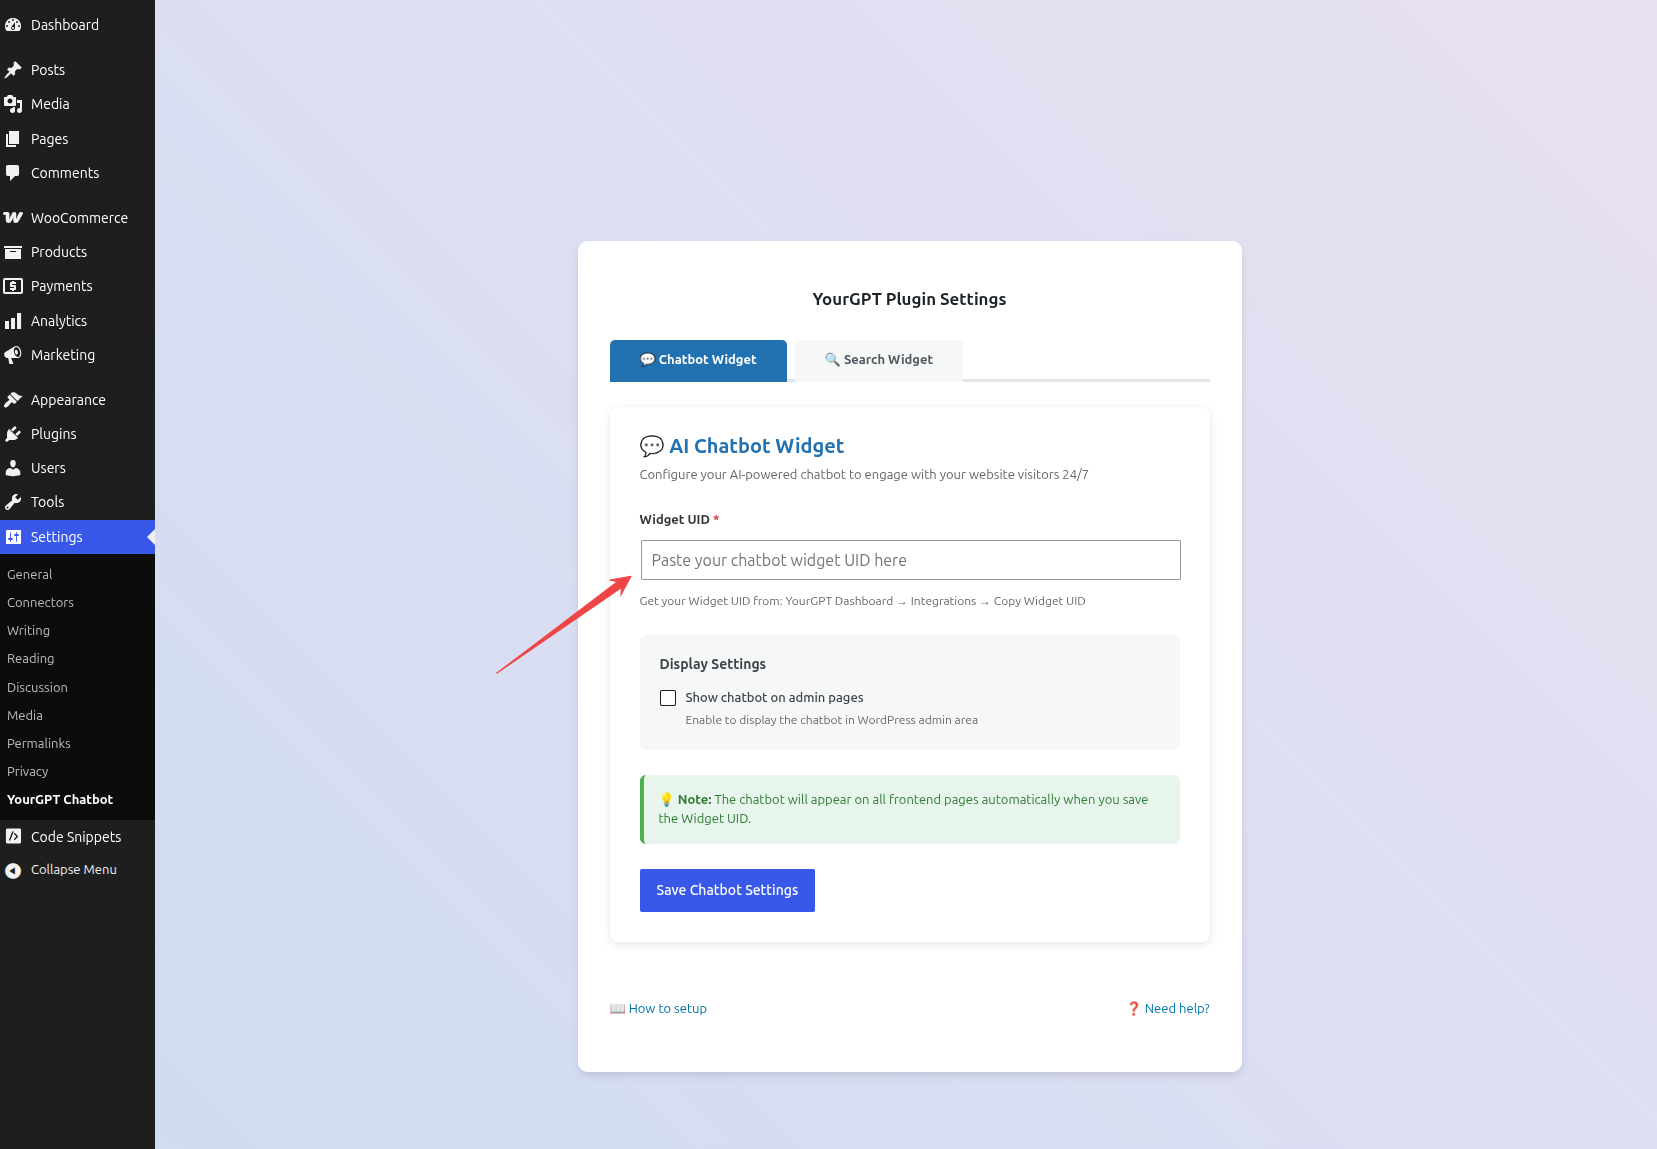
You'll find your Widget UID in the YourGPT dashboard under the Integration section.
Option 2: Add the Script Manually
If you'd rather not install a plugin:
Step 1: Copy Your Widget Script
In your YourGPT dashboard, go to the Integration section and copy the widget script provided.
Step 2: Paste It Into Your Site
Install a header-and-footer script plugin (such as Header and Footer Scripts), go to its settings, and paste your widget script into the Footer section. Save the changes.
That's it — your chatbot is now live on your WooCommerce store.
Next Step
Once the widget is installed, turn on AI Copilot Actions so your chatbot can search your catalog, show product cards, and add items to the cart directly in the chat.
Related Articles
Sync WooCommerce with YourGPT Using Webhooks
Automatically Update Product and Customer Data Between Your WooCommerce Store and YourGPT
How to Generate WooCommerce API Keys for Chatbot Studio?
If you want to pull data from WooCommerce inside your AI Studio for example to look up an order’s status you’ll need a Consumer Key and Consumer Secret.
How to Use AI Copilot Actions for WooCommerce
If your website runs on WooCommerce, your chatbot can turn into a real shopping assistant—searching your catalog, showing product cards, and adding items to a shopper's actual cart, all without leaving the chat.