
How to Use AI Copilot Actions for WooCommerce
AI Copilot Actions let your AI agent interact directly with your WooCommerce store.
Instead of only answering product questions, the agent can search your catalog, show interactive product cards, check product options, add items to the shopper's real cart, and display their current cart, all without making them leave the conversation.
Enable WooCommerce Copilot Action
Go to Functions → AI Copilot Actions, then select WooCommerce from the list. Turn on whichever of the 5 actions you want your chatbot to use.
You will see five available actions:
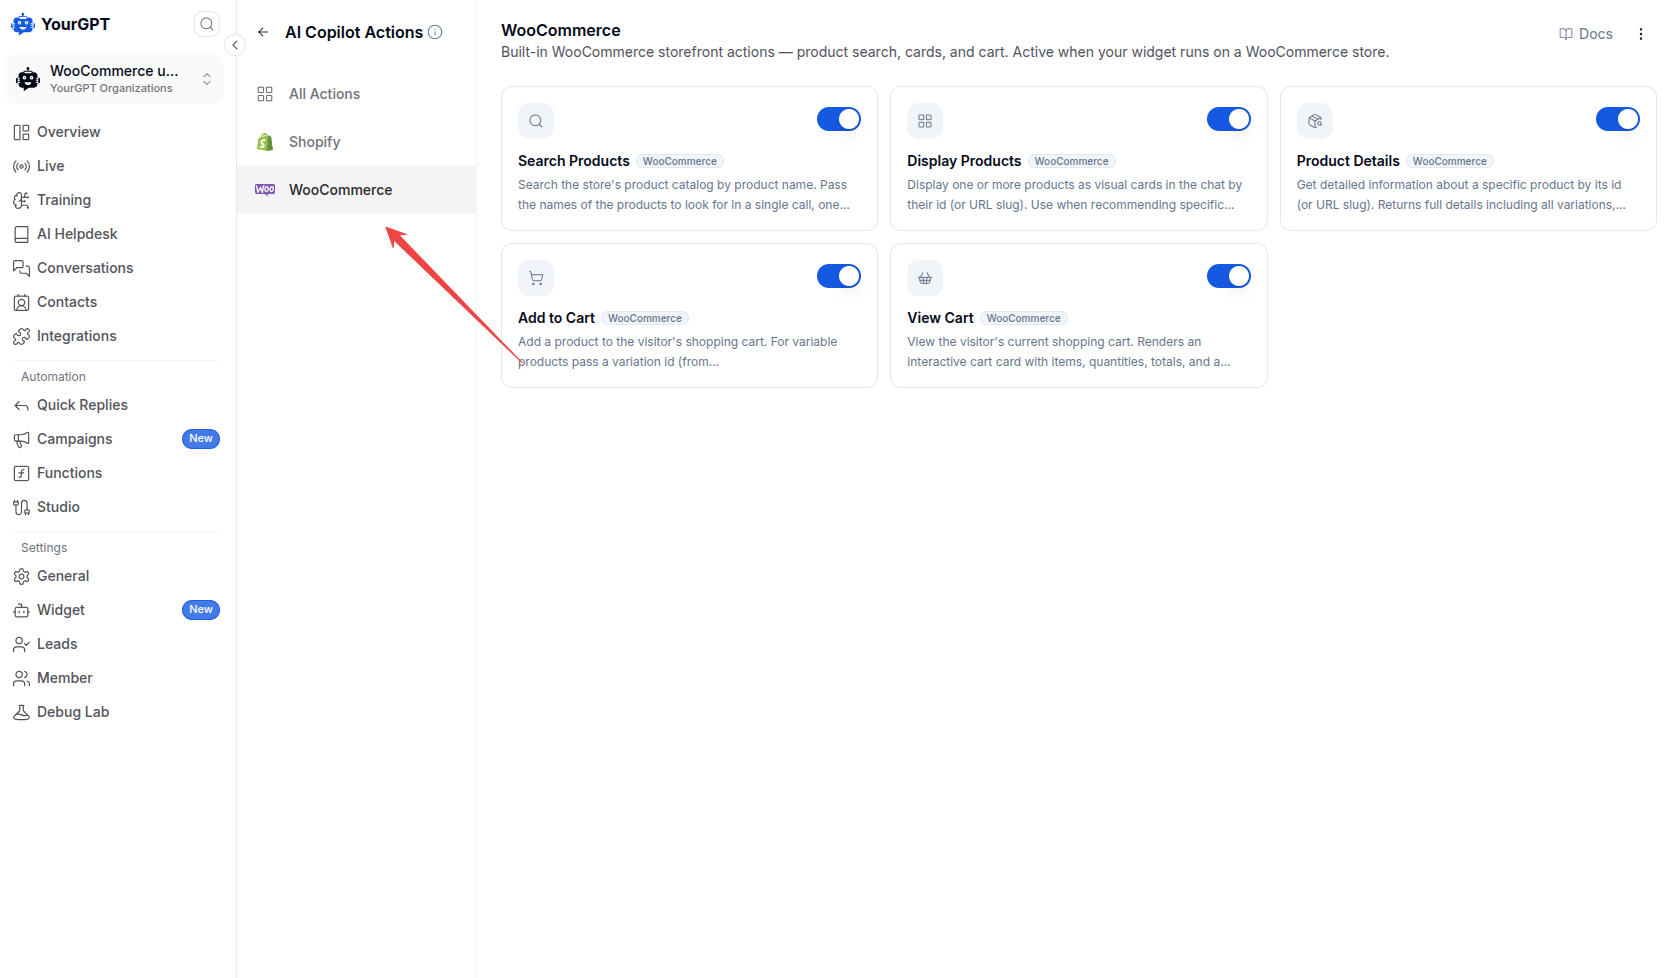
These actions work directly on your WooCommerce store.
The 5 Actions
These steps work together, though a shopper does not need to know that; it just feels like one smooth conversation.
1. Search Products
Search Products allows the AI agent to search your WooCommerce catalog when a shopper asks for a product.
For example:
"Do you have any t-shirts?"
The AI searches the store catalog for relevant products and uses the results to decide what to show or recommend next.
This action runs in the background, so the shopper does not see a separate search step.
2. Display Products
The AI displays matching products as cards directly within the chat. These cards include an image, name, and price. If an item is on sale, the original price is shown with a strikethrough.
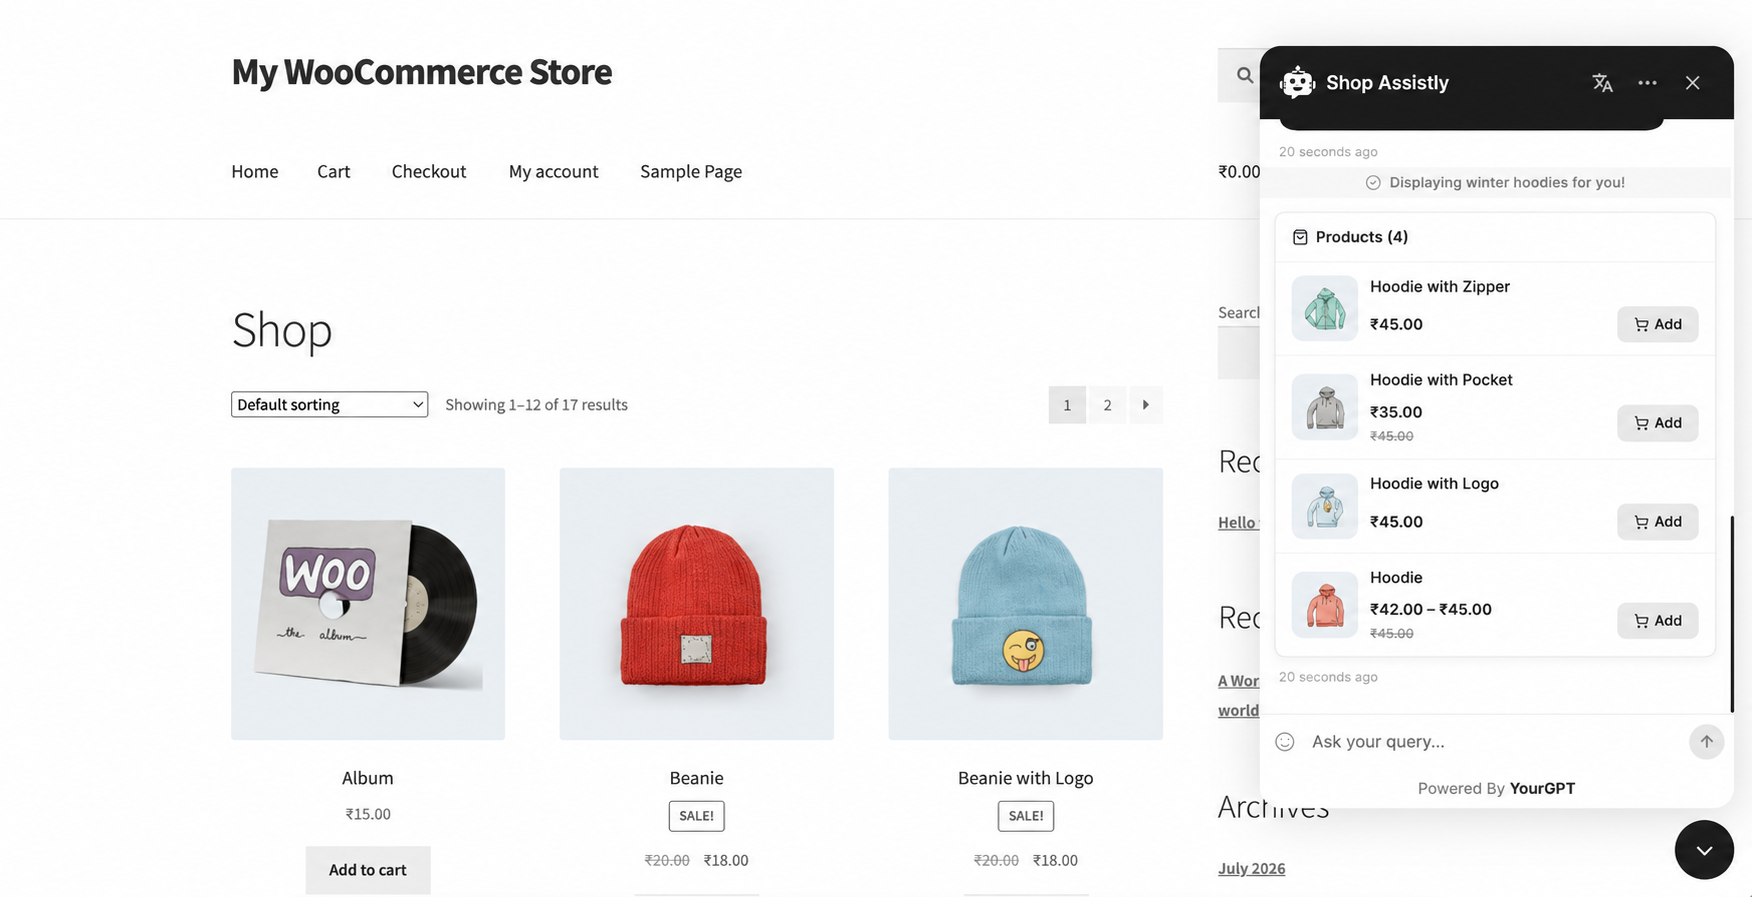
Tapping Add on a card adds it straight to the shopper's cart — instantly, no confirmation, since they're clicking a real button.
Tapping a product's image or name opens a full product view with photos, description, and options like size or color.
Once a product is already in the cart, the card shows an "In cart" badge with quantity controls, and the button becomes "Add another option" for picking a different variation.
3. Product Details
When the AI needs specifics about a product — like which sizes or colors are available, or the exact variation to add to cart — it looks this up behind the scenes. Shoppers don't see this as a separate step; it just feels like the AI already knows the answer.
4. Add to Cart
This is the shopper's real WooCommerce cart — the same one they'd see at checkout, not a separate one just for chat. There are two ways an item gets added:
Through conversation — if a shopper types something like "add that to my cart," the AI asks for confirmation first: a dialog titled "Add to Cart" asking "Add 1x [Product] to your cart?" with Cancel and Add to Cart buttons.
By tapping a button — clicking Add on a product card or in the cart view adds immediately, no confirmation needed.
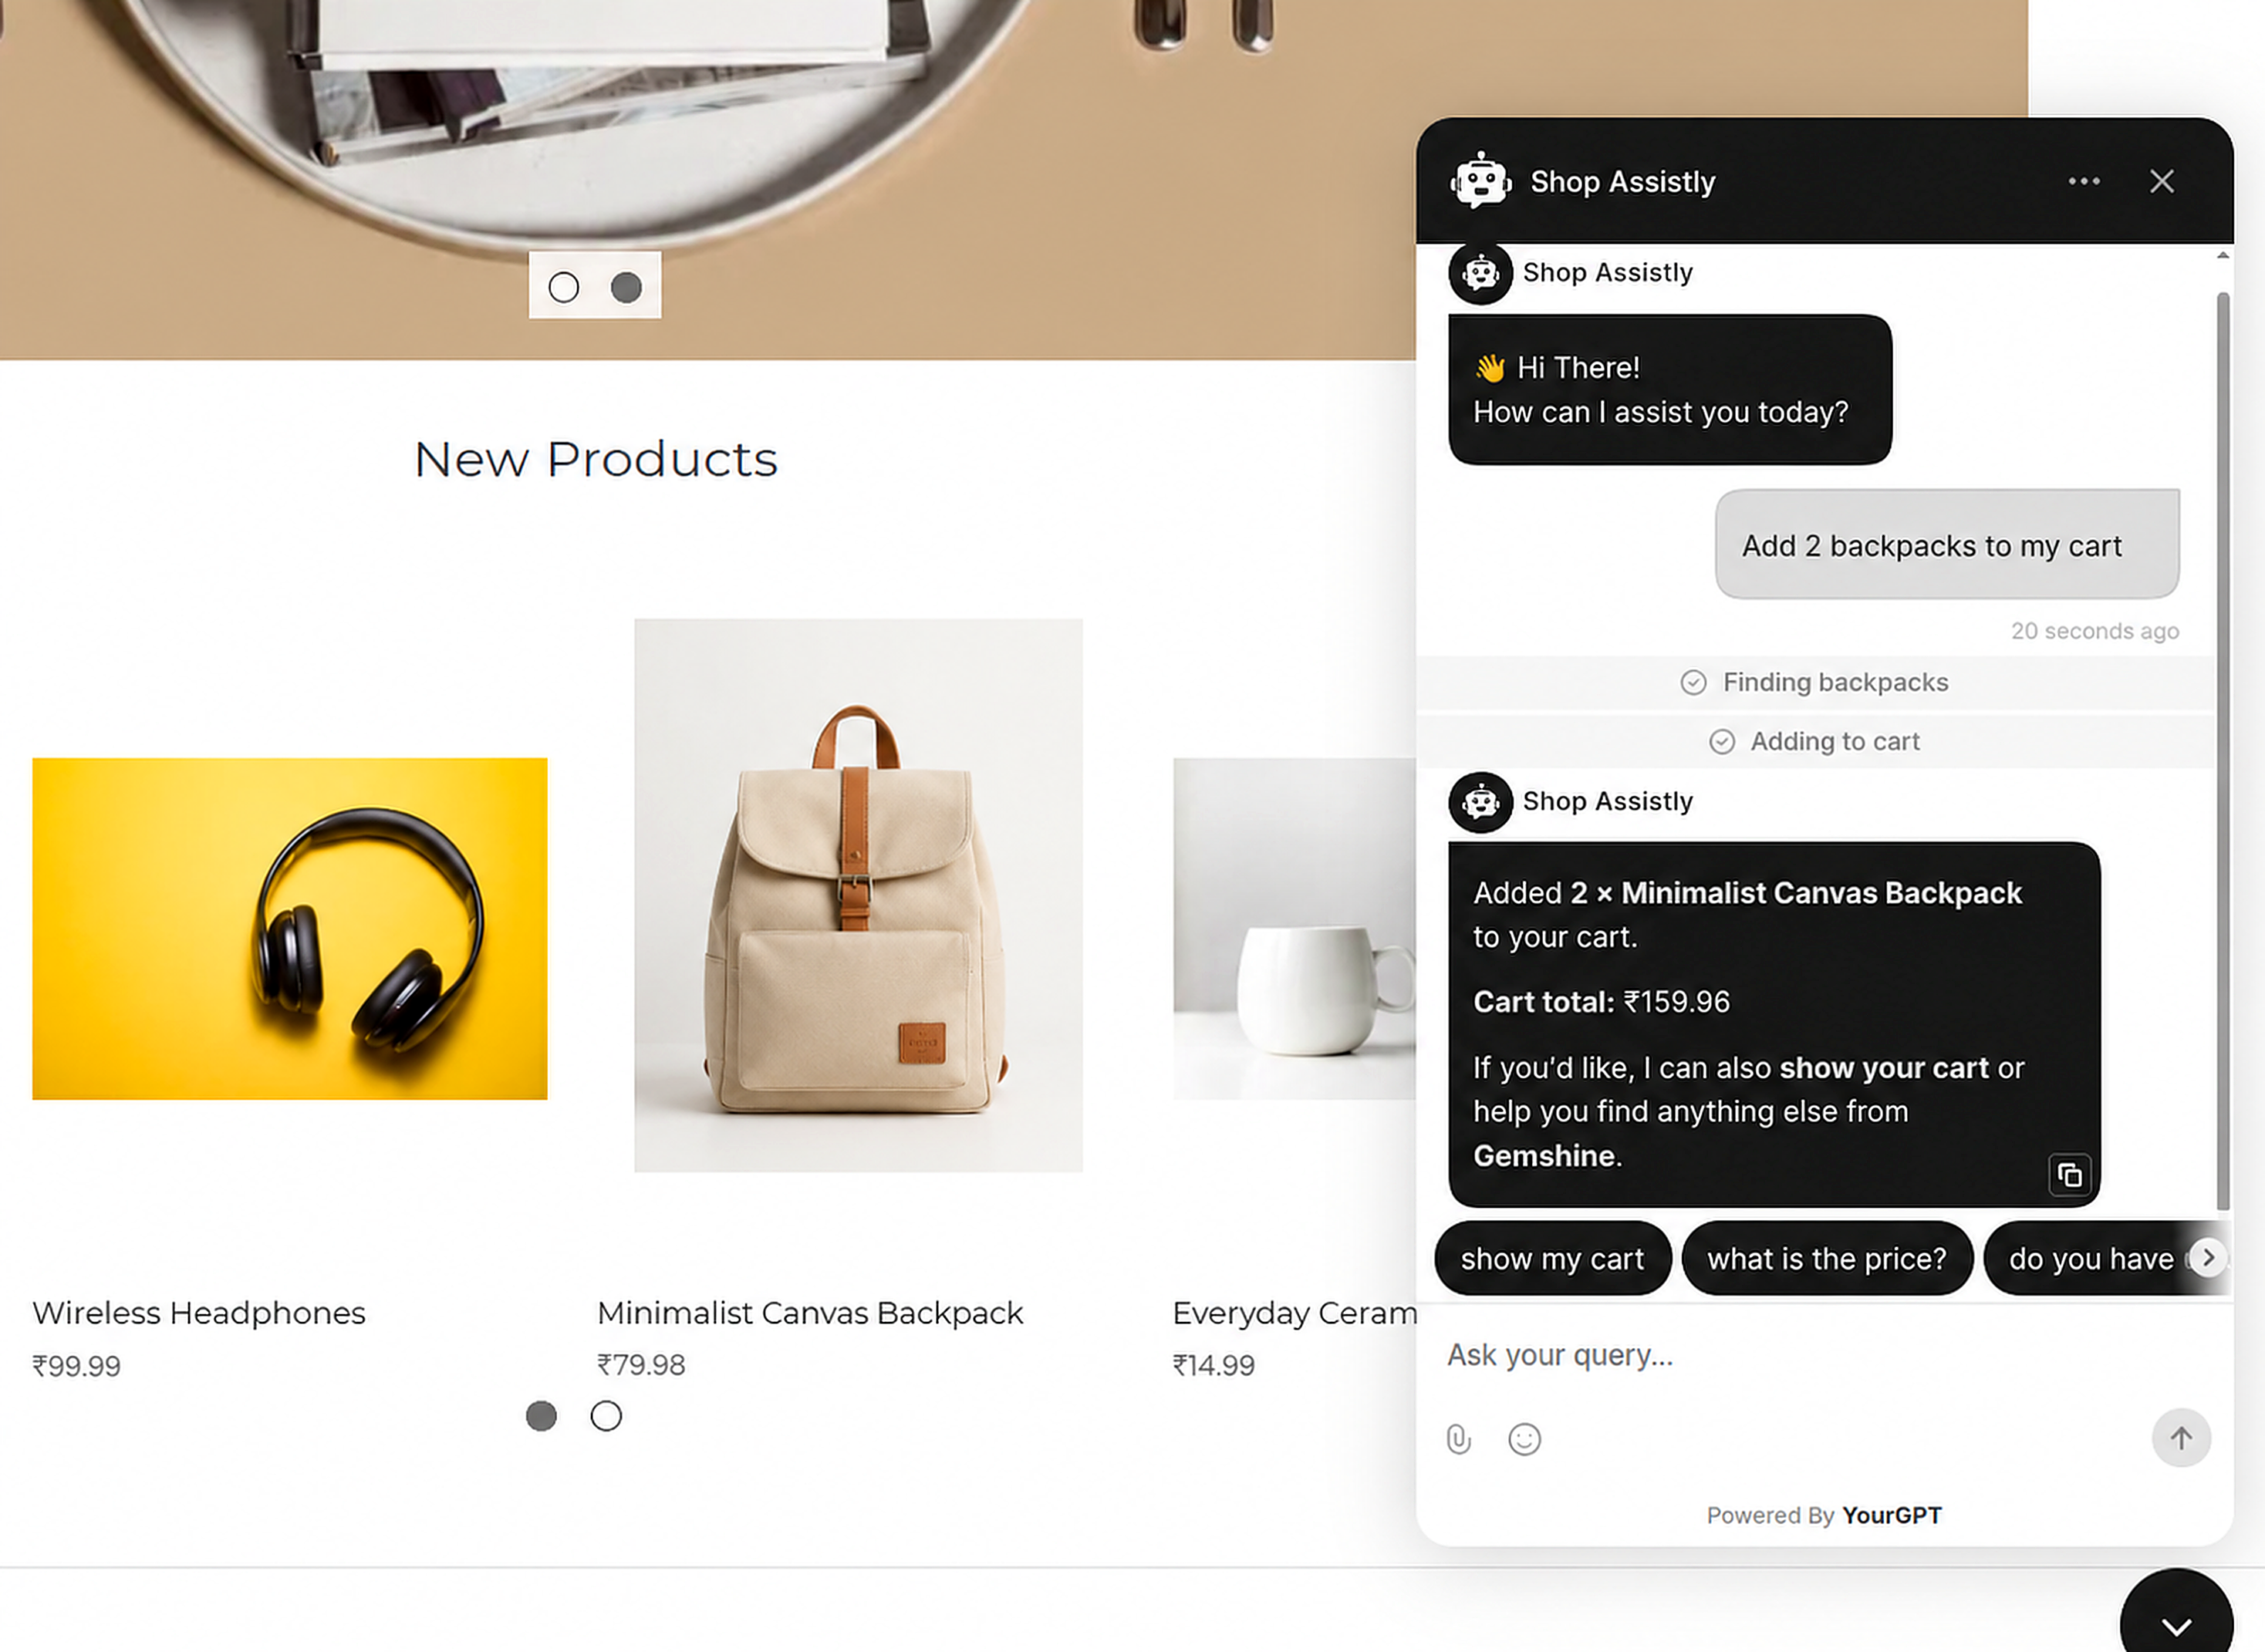
For variable products (like a t-shirt with color and size), tapping Add opens an option picker so the shopper can choose before it goes in the cart.
If an item is out of stock it's clearly marked and can't be added. If your store limits stock, the quantity stepper stops at the amount available and shows "Only N available."
5. View Cart
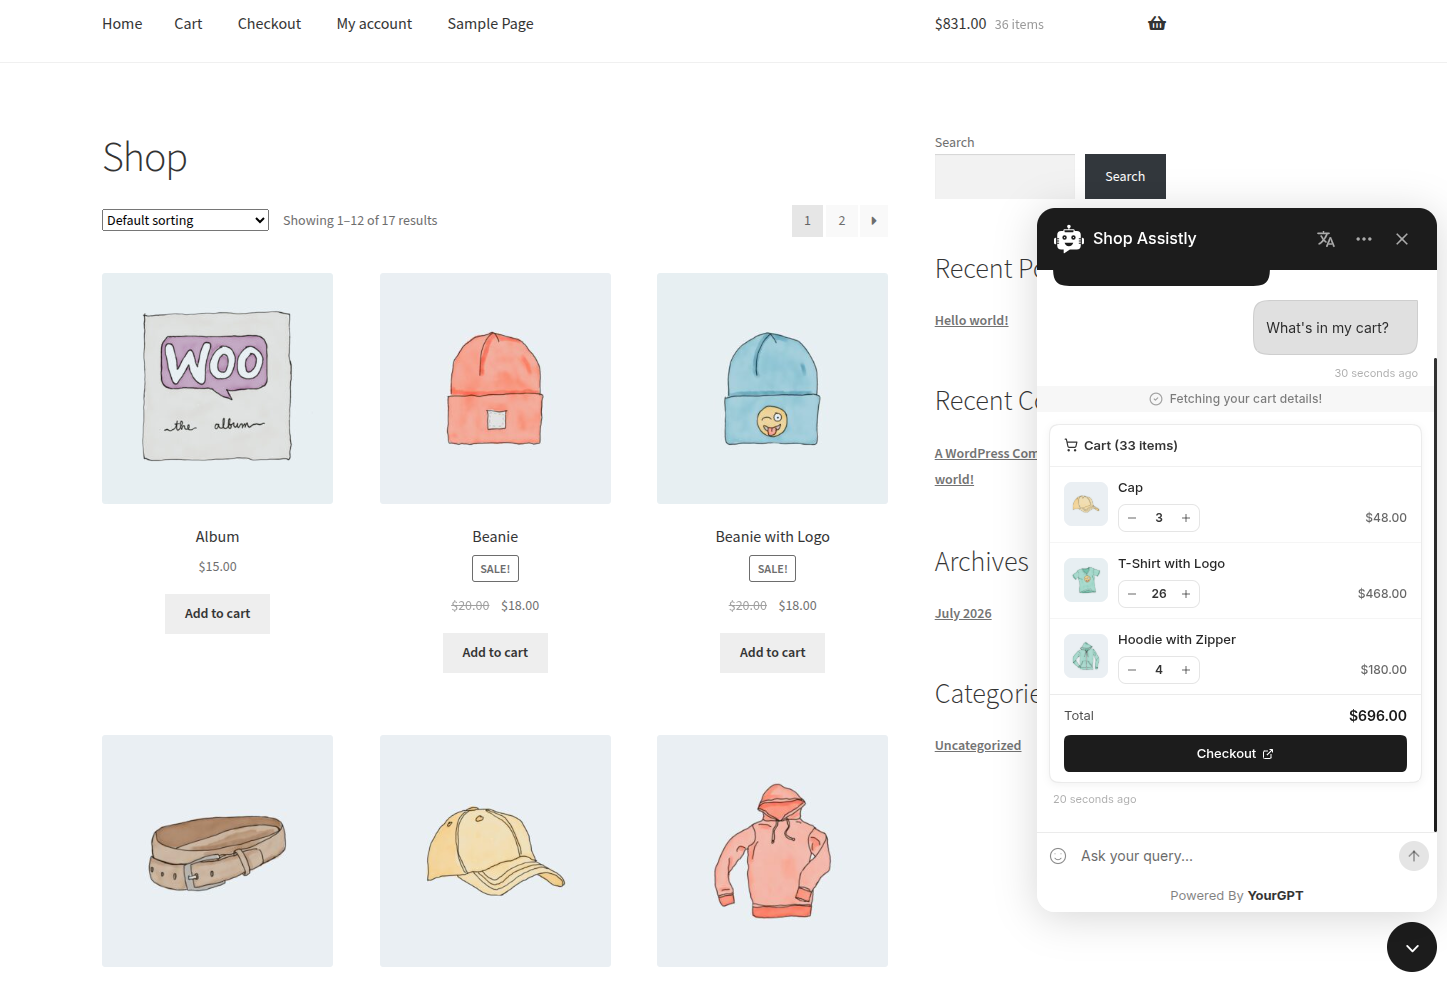
Shows an interactive cart card — item images, quantities (with +/− controls), prices, and a running total — plus a Checkout button that takes the shopper straight to your store's real checkout page.
Good to Know
Requires Agent Mode. Like all AI Copilot actions, these only run when Agent Mode is enabled.
These work on your website only. Copilot Actions run in the shopper's browser on your store, so they don't apply to messaging channels. For those, use the WooCommerce template in AI Studio.
Each action can be turned on or off individually — you don't have to enable all 5 at once.
Related Articles
How to Install the YourGPT Chatbot on WooCommerce?
Add the YourGPT AI chatbot to your WooCommerce store in a few steps. WooCommerce runs on WordPress, so you have two options — use our WordPress plugin, or paste the widget script into your site.
Sync WooCommerce with YourGPT Using Webhooks
Automatically Update Product and Customer Data Between Your WooCommerce Store and YourGPT
How to Generate WooCommerce API Keys for Chatbot Studio?
If you want to pull data from WooCommerce inside your AI Studio for example to look up an order’s status you’ll need a Consumer Key and Consumer Secret.