Flow : Scenarios, Blocks, Steps & Connections
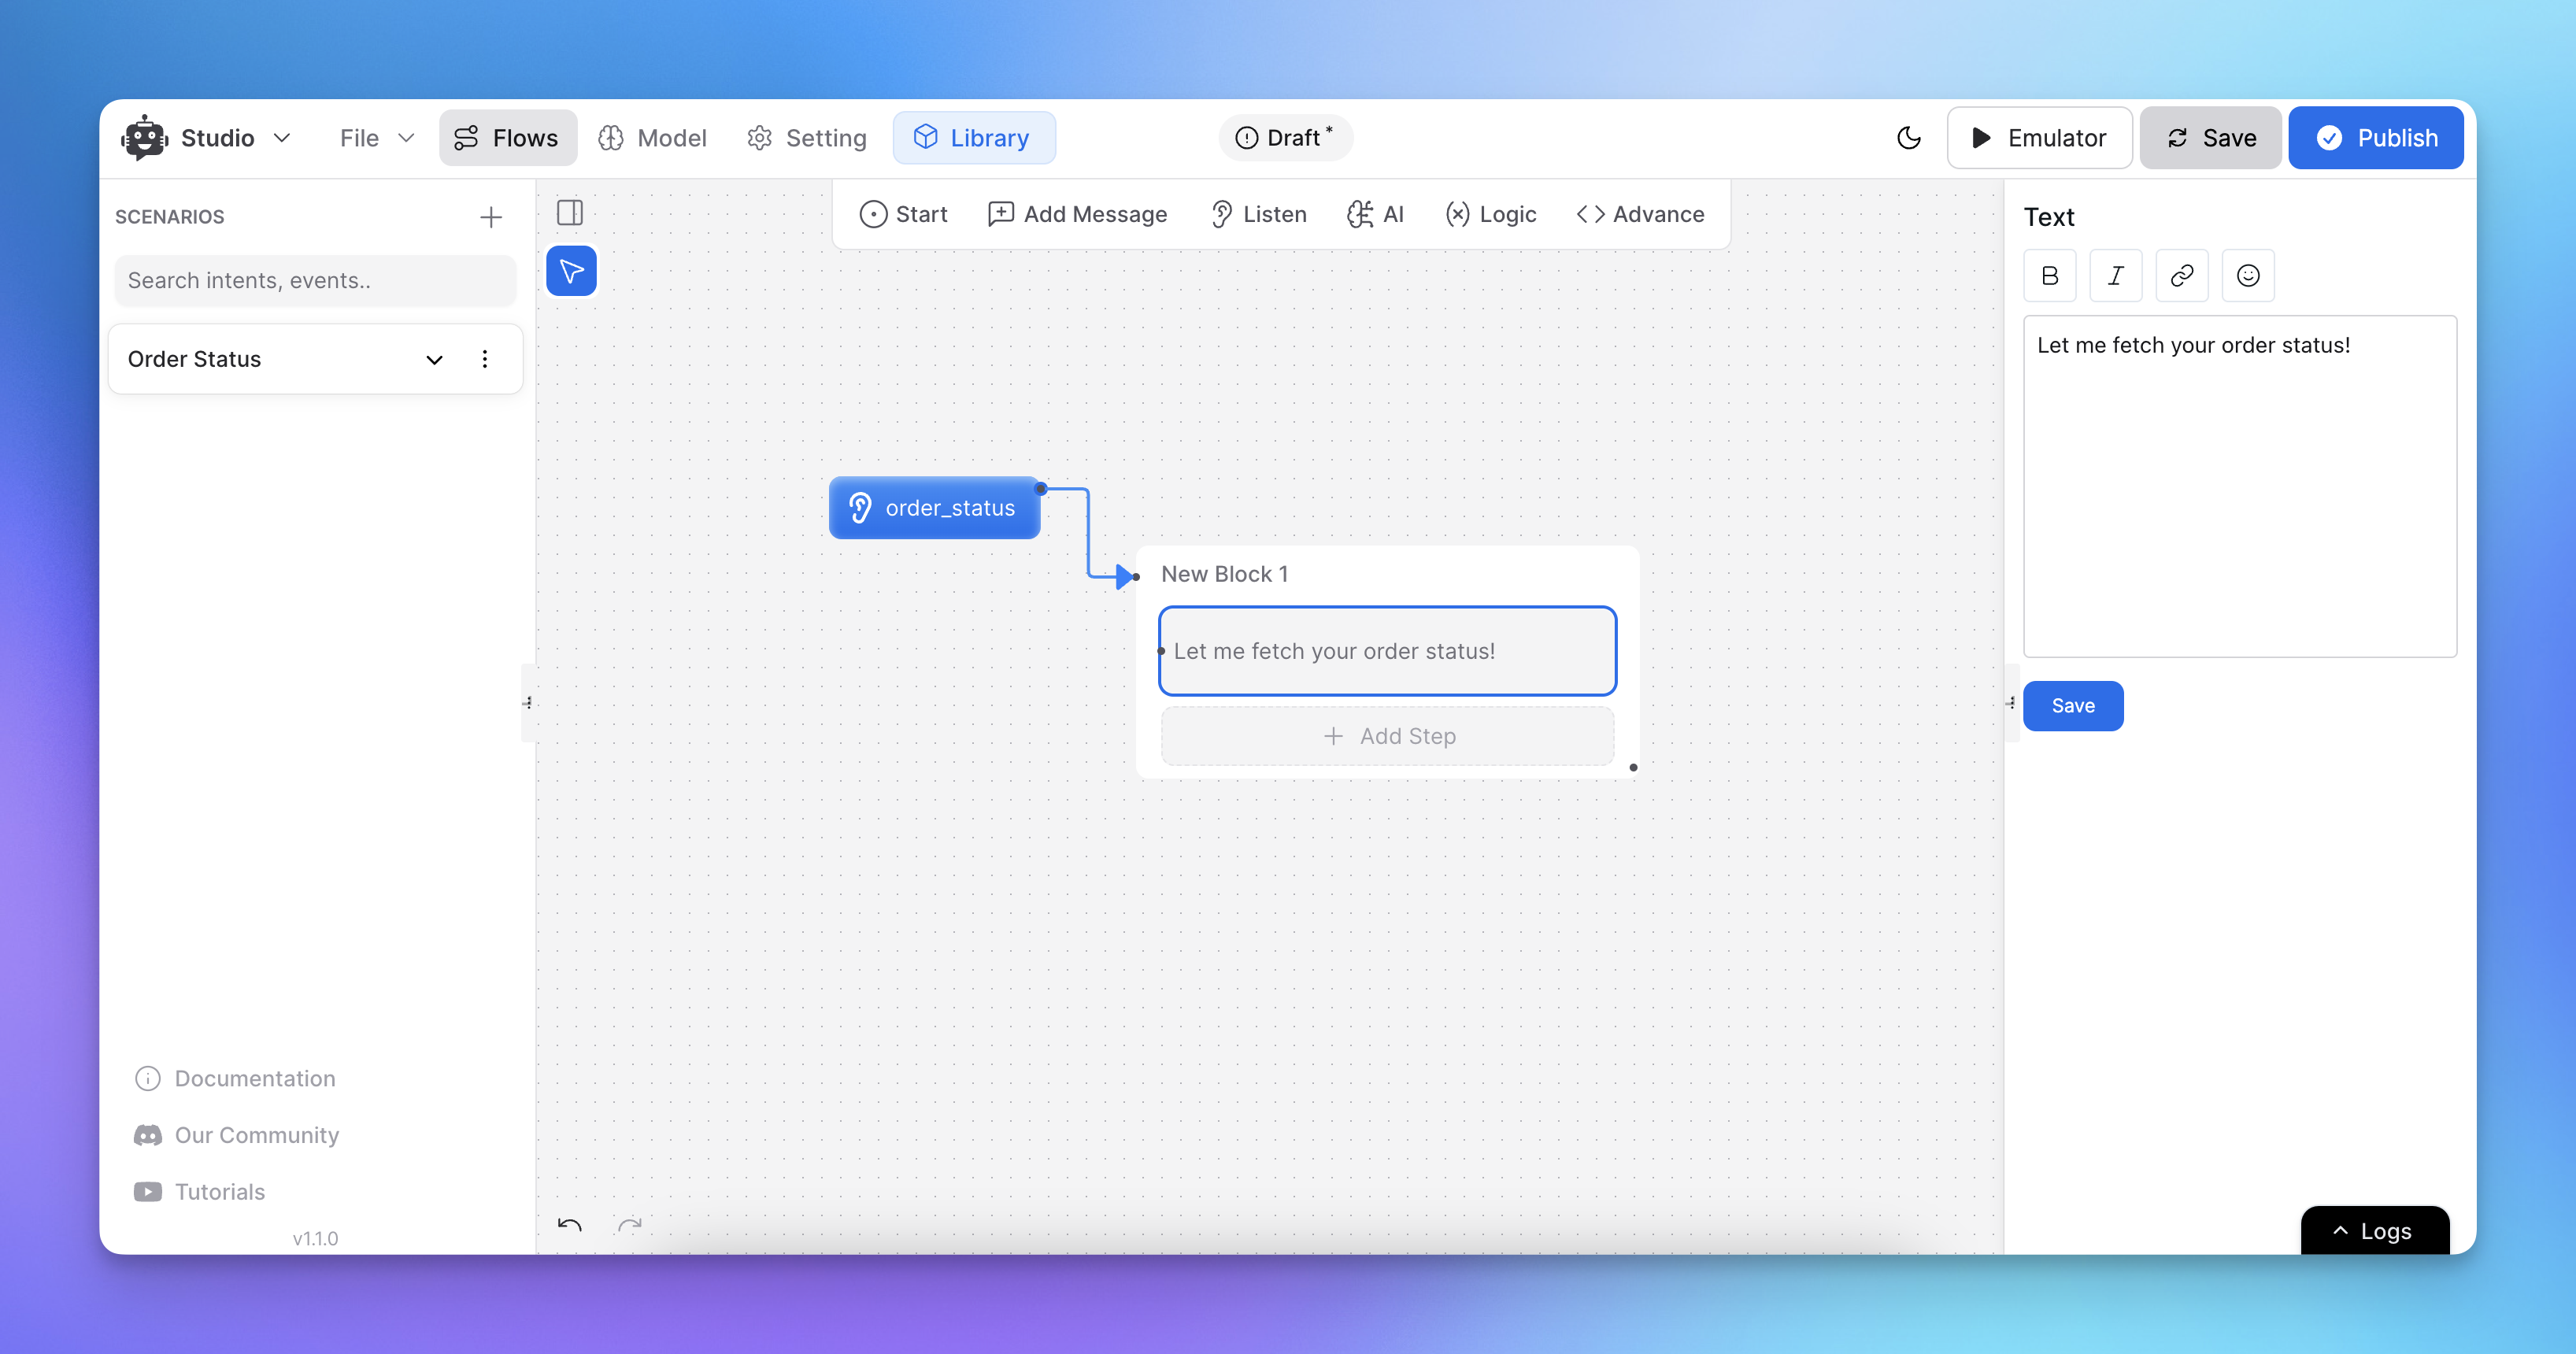
Steps/Nodes are the basic units in YourGPT Chatbot Studio. They represent every action your chatbot performs, from printing default text to displaying images, calling APIs, running JavaScript, or accessing the AI Knowledgebase.
One or more steps can be grouped into Blocks, which contain one or more steps. Blocks have names and are useful for organizing different parts of your agent.
Paths/Connections help guide the execution process. They connect point A to point B. A path can lead to an entire block or specific steps within blocks. Some nodes let us define different paths based on conditions like Success or Failure for API nodes and condition matching nodes.
Designing in YourGPT Chatbot Studio: A Quick Overview
YourGPT Chatbot Studio offers a flexible environment to design conversational flows and scenarios using blocks and steps. Here’s how you can get started:
Creating a Scenario
To begin designing, navigate to the left sidebar and click on “Create Scenario”. This will serve as the canvas where you’ll build your conversational flow using nodes, steps, and blocks.
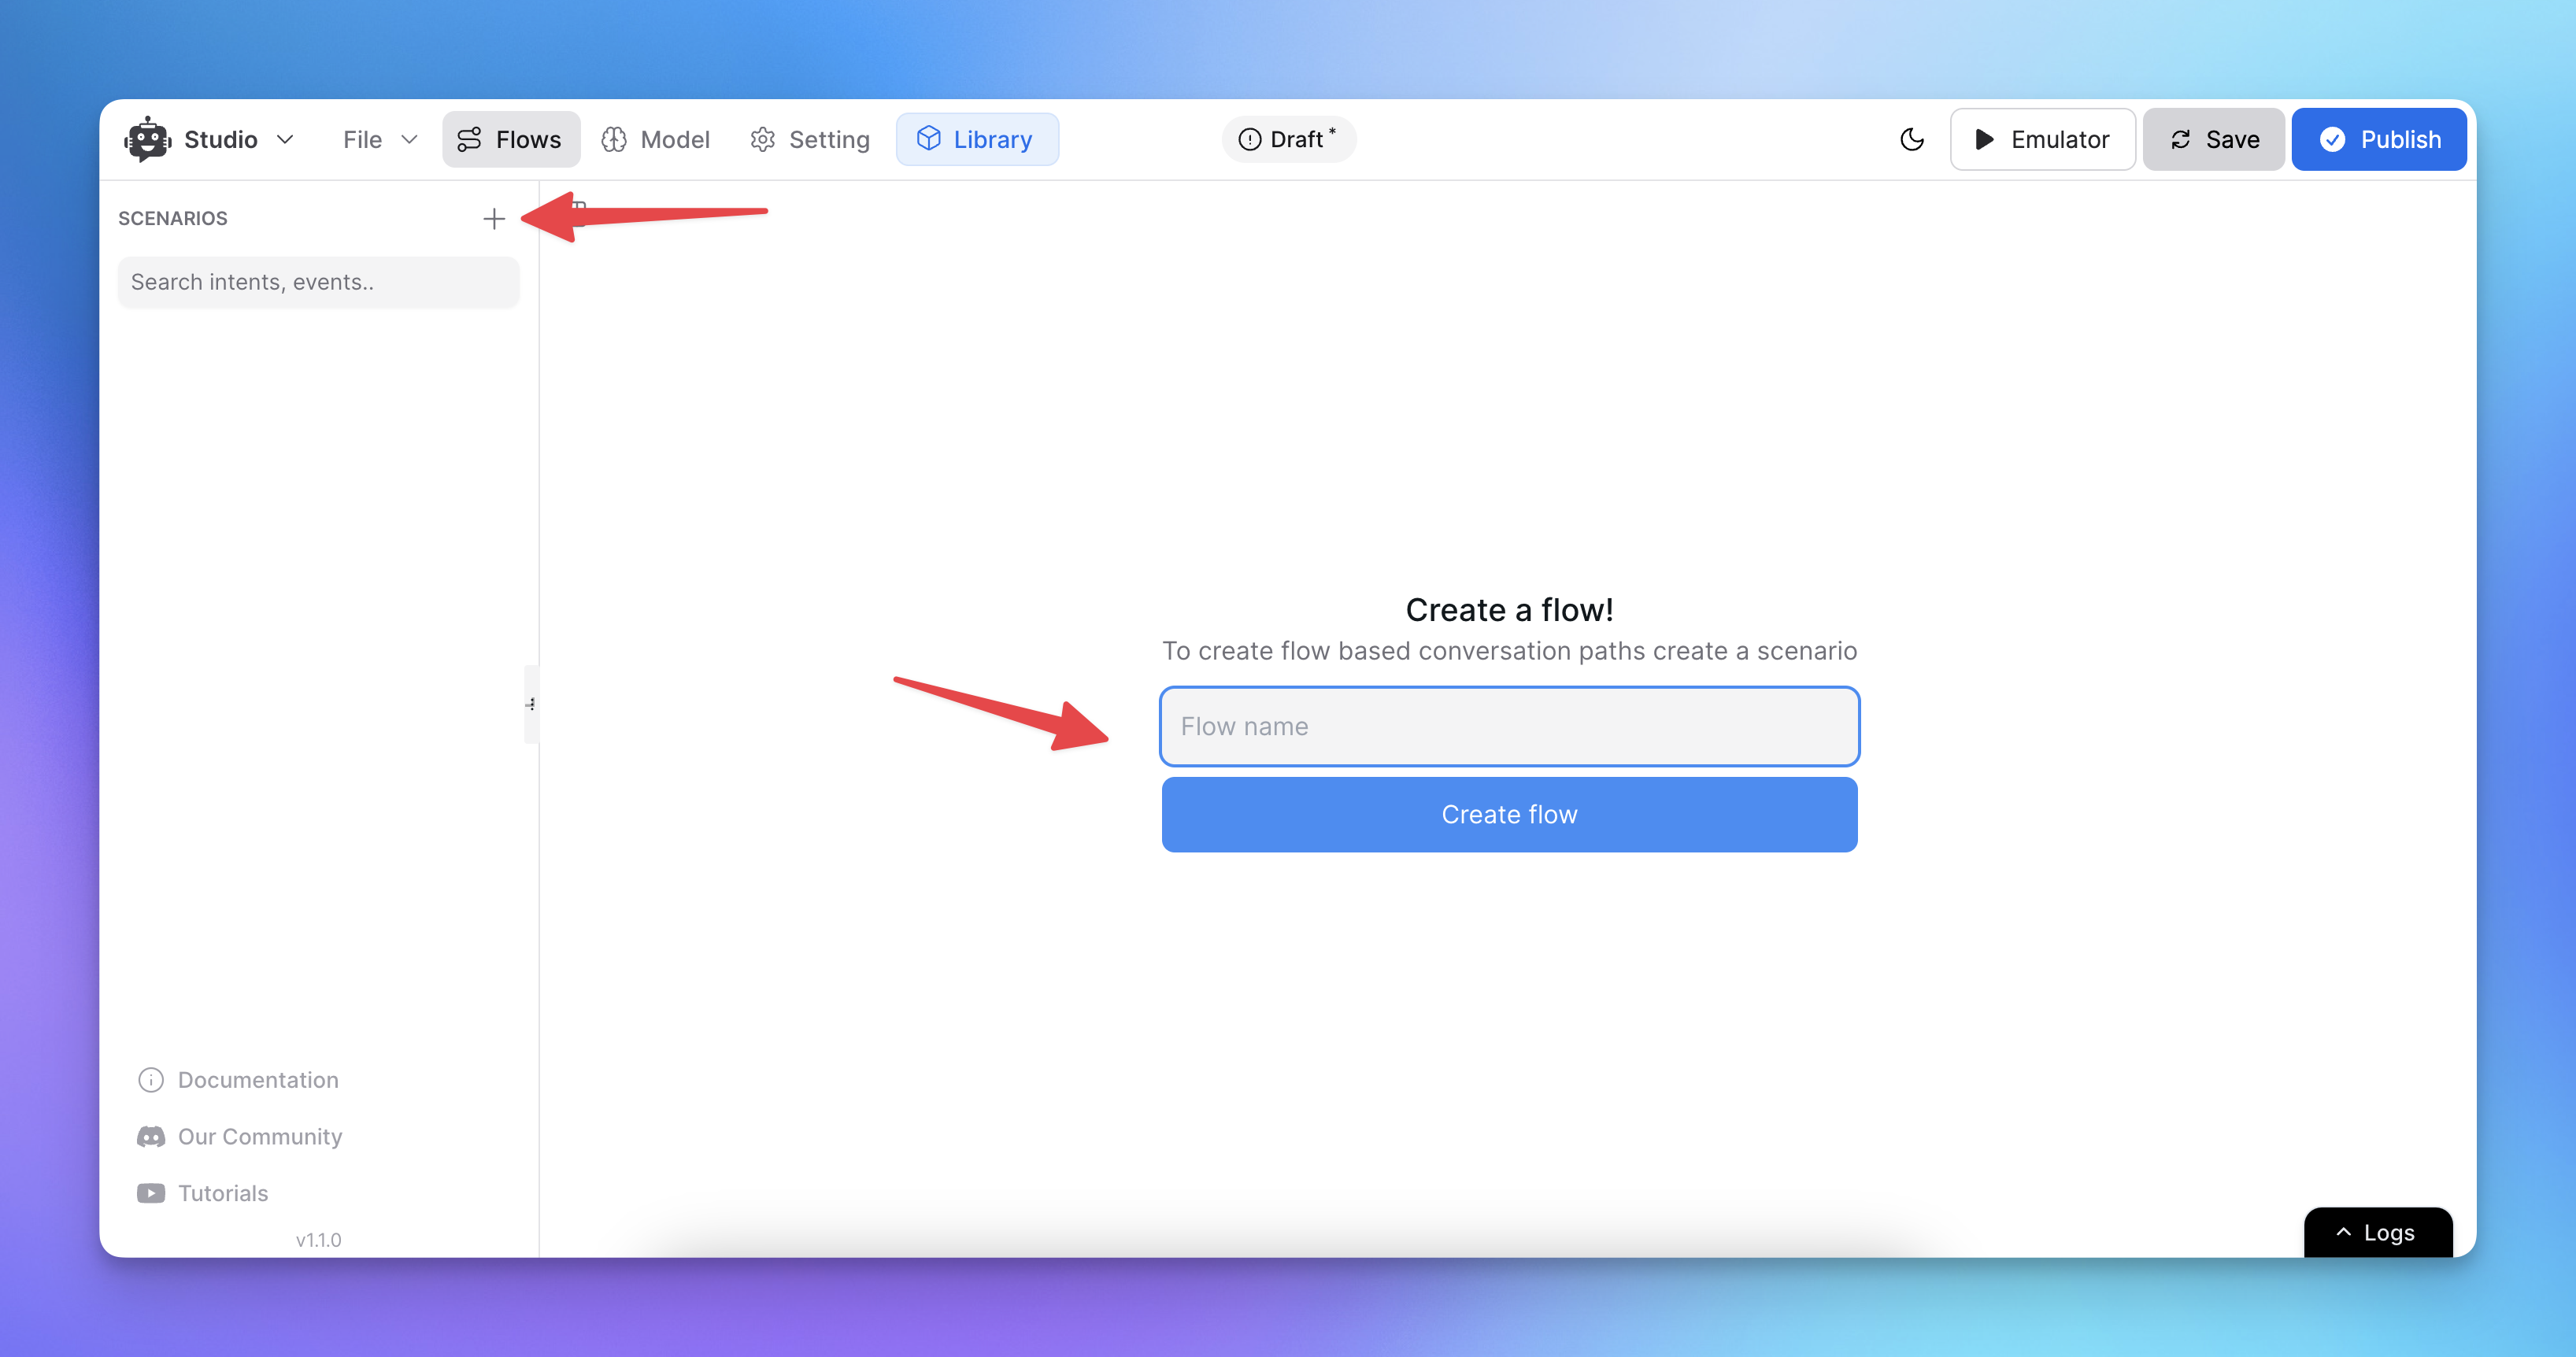
Adding and Configuring Blocks and Steps
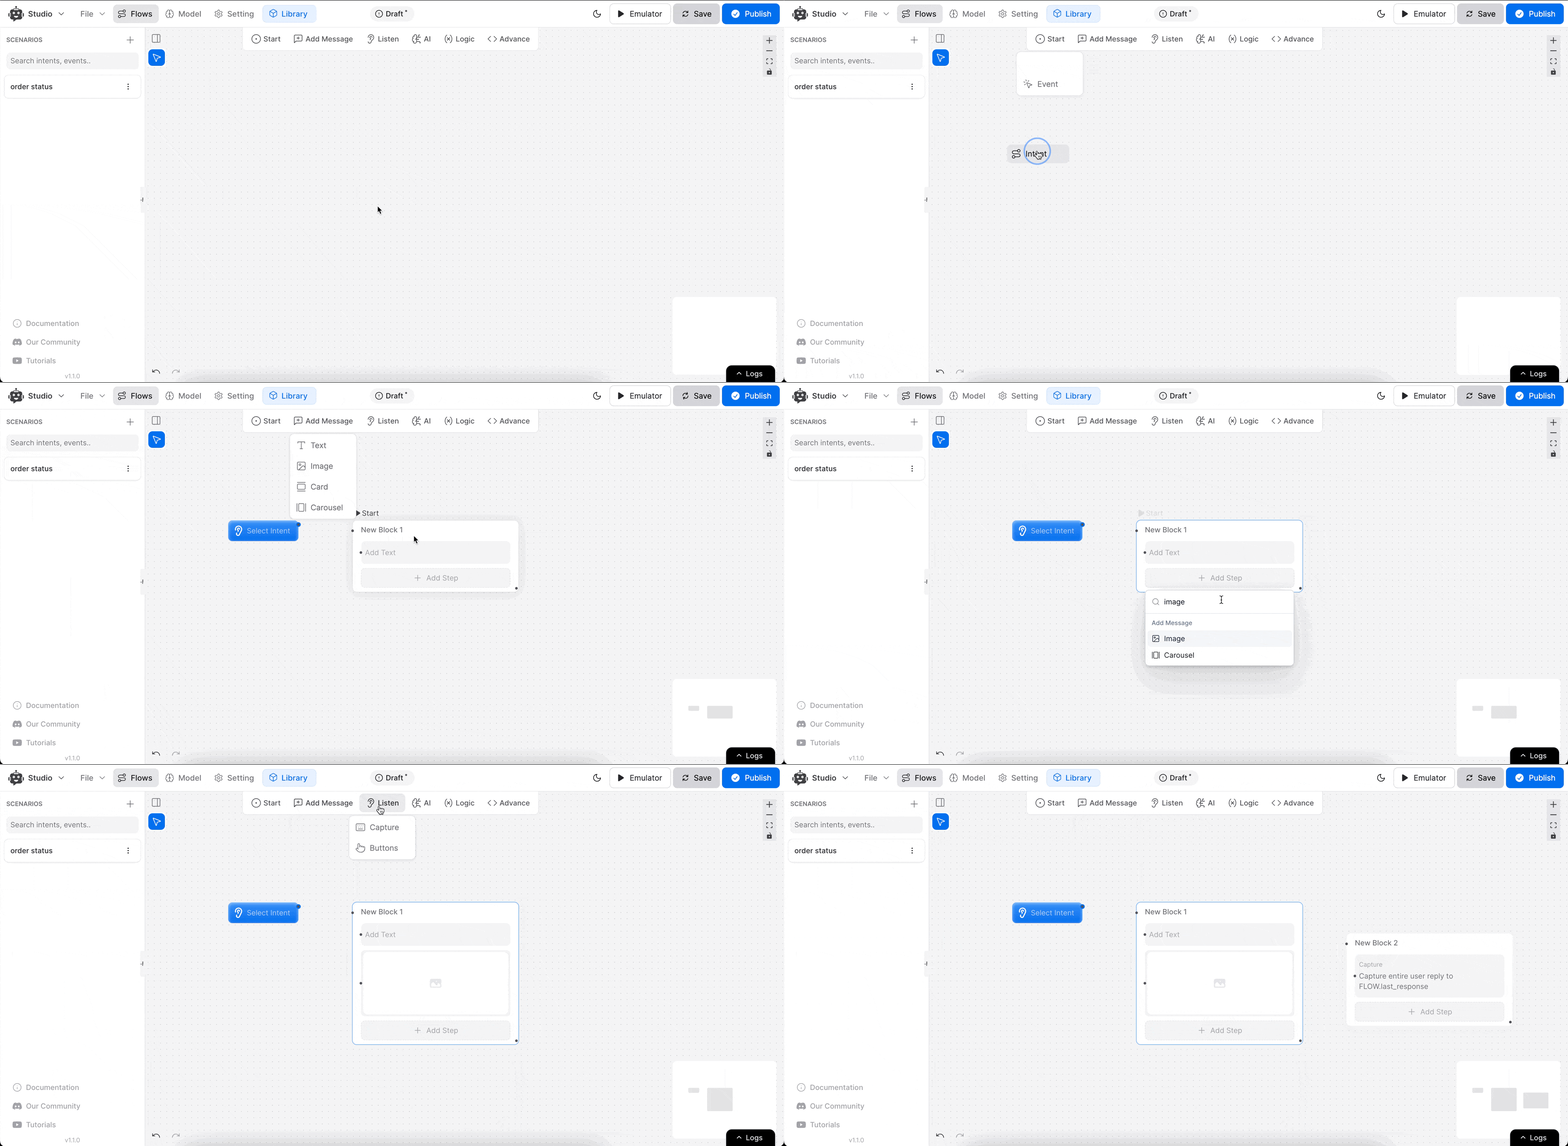
Adding Nodes and Steps:
To add a node to your scenario, simply drag any node from the toolbar and drop it onto the canvas. This will automatically create a block for the node, with the node as its first step.
Adding Multiple Steps:
You can easily add more steps to an existing block by either dragging additional nodes onto the block or simply clicking the “Add Step” button for a quicker option.
If you prefer to create a new block, drag the node onto any blank space on the canvas. A new block will be created automatically.
Editing Node Content
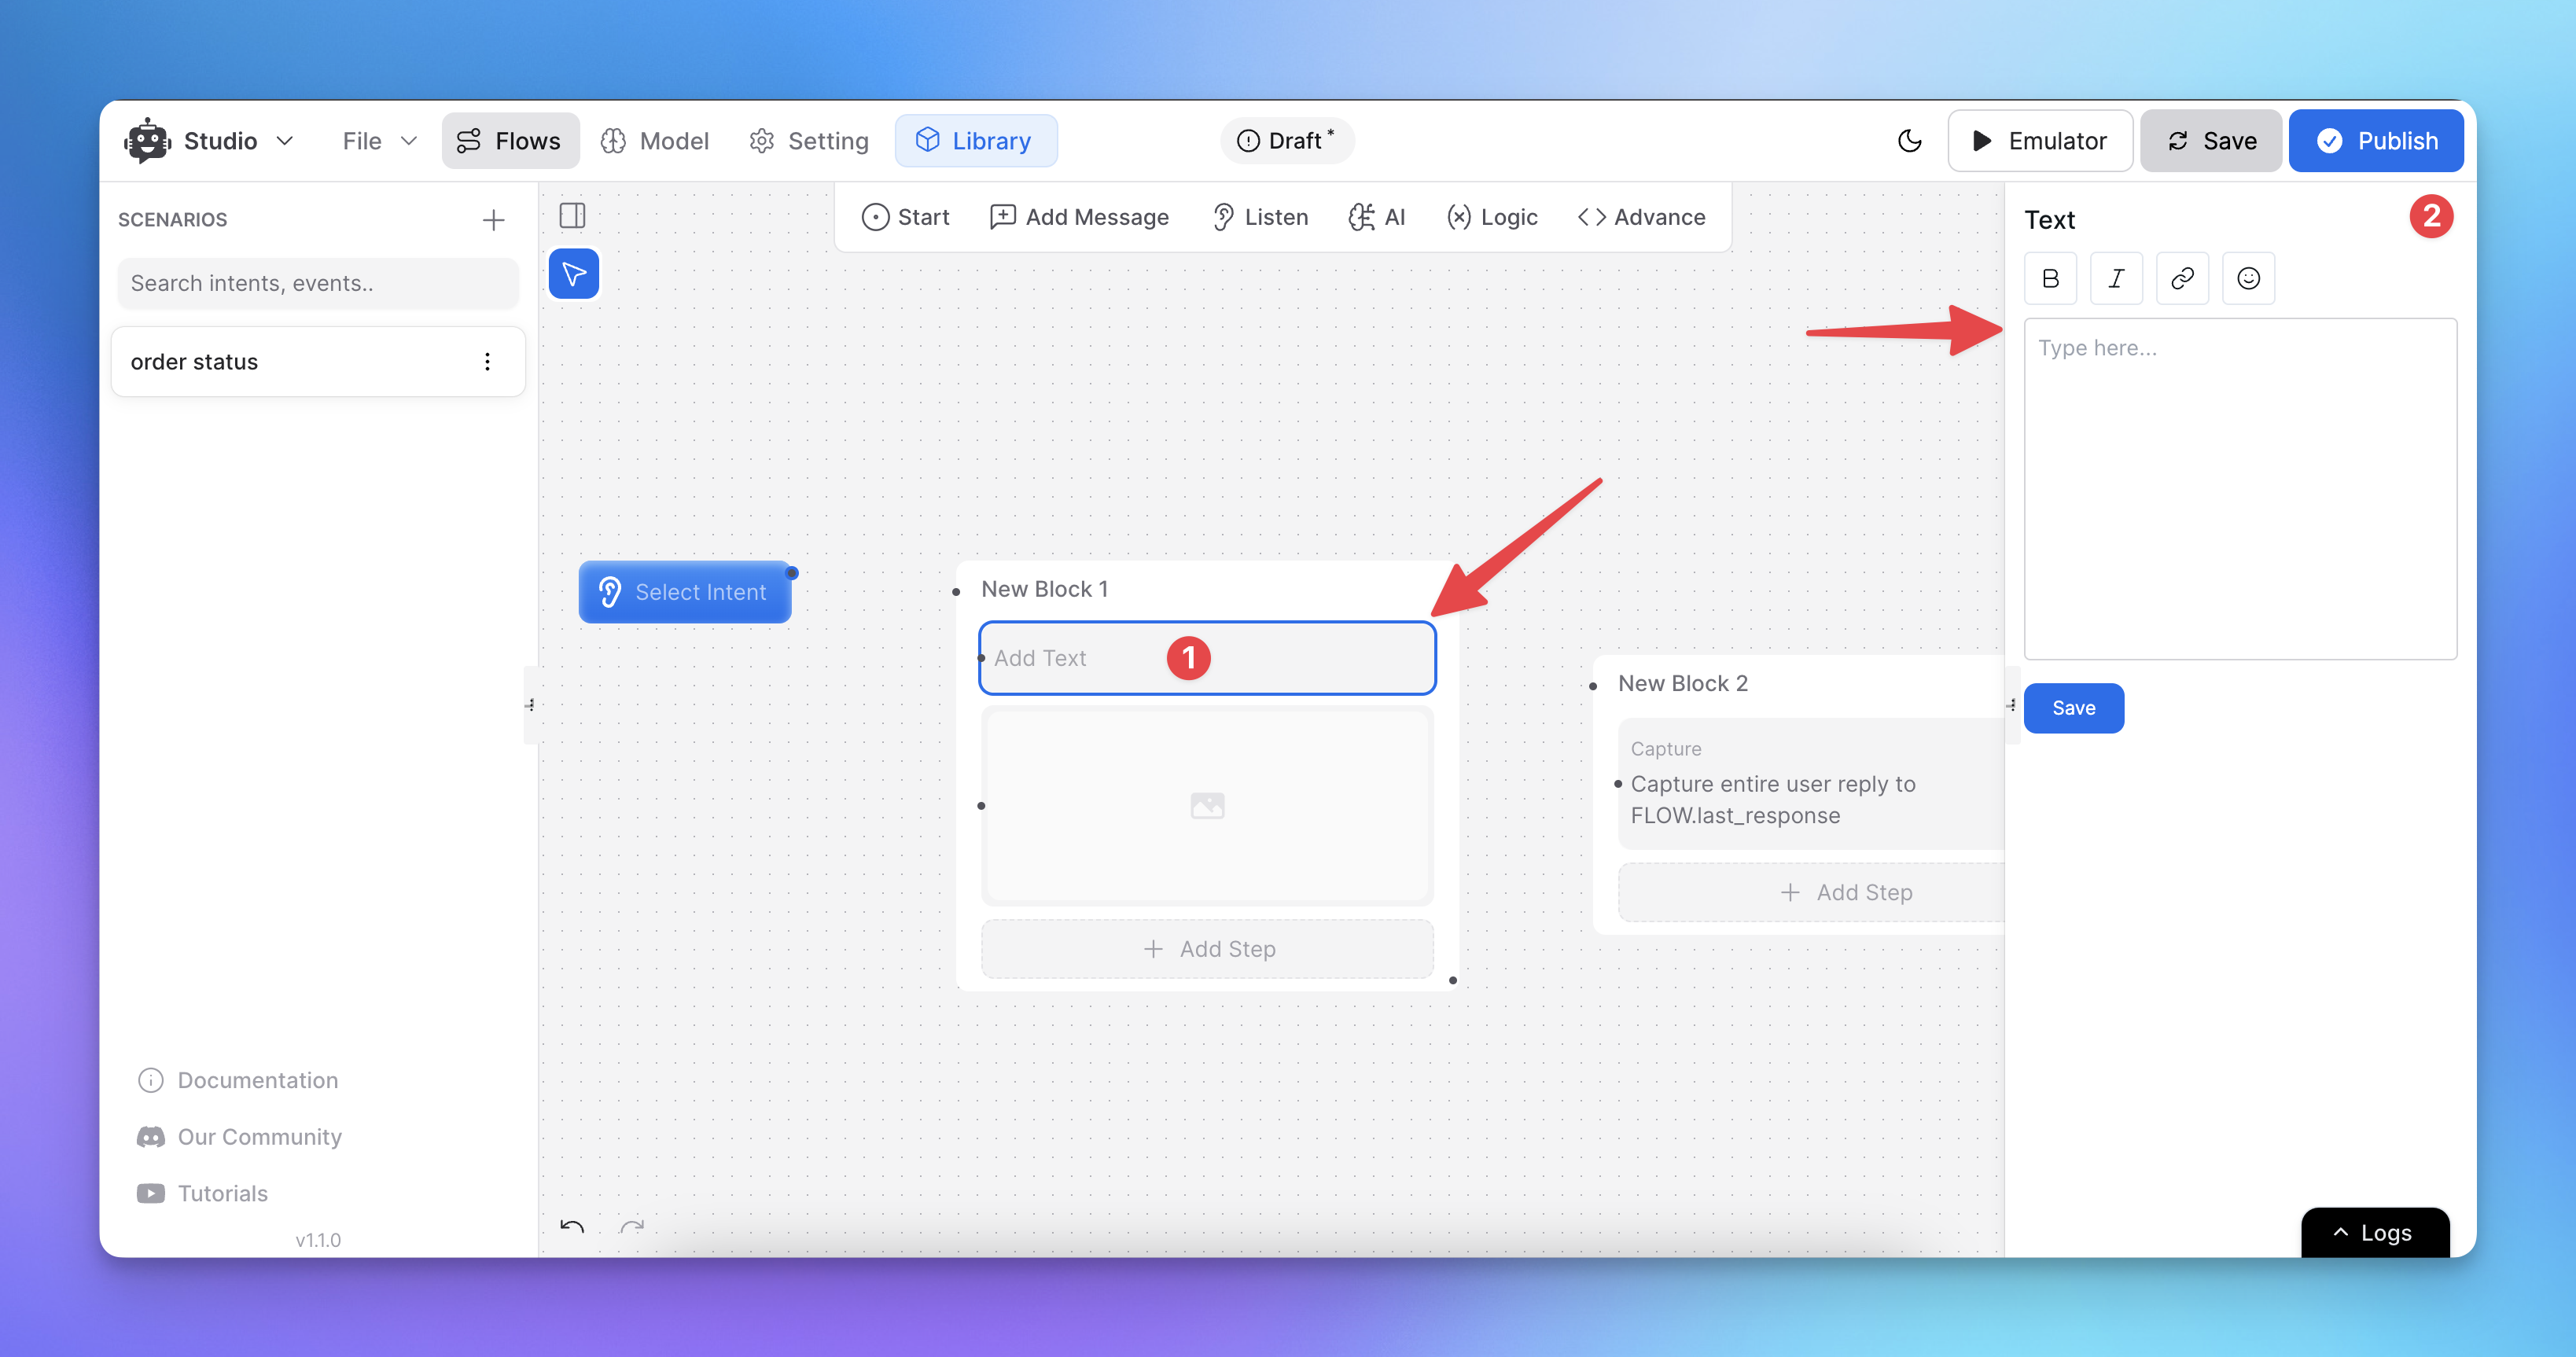
Click on any node or step to open its details on the right-hand panel. Fill in the content according to your requirements, such as API details, custom actions, or conditions.
Naming and Renaming Blocks:
You can rename any block by double-clicking on the block’s name. Enter the new name to better organize your conversation flow.
Deleting a Block:
Right-click on a block and select the “Delete” option, or press Delete/Backspace on your keyboard while focusing on the block.
Deleting a Step:
The same process applies for steps. Right-click on the step or select it and press Delete/Backspace to remove it from the block.
Creating Paths and Connections
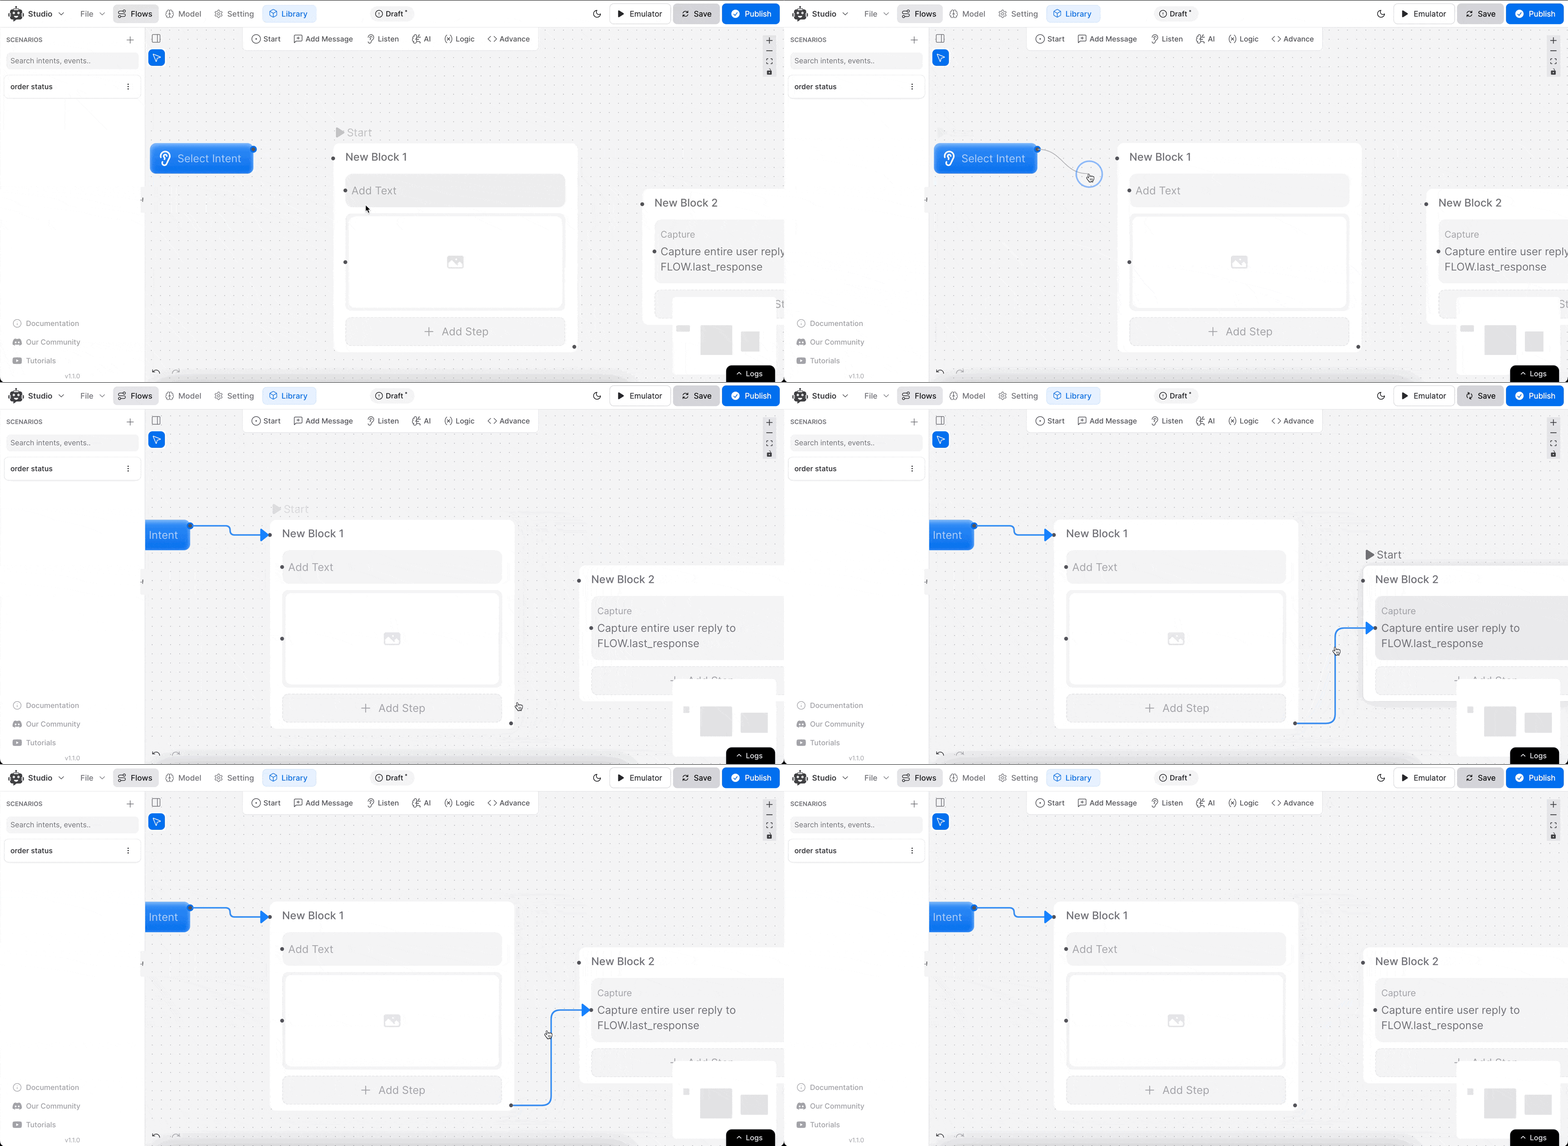
YourGPT Chatbot Studio enables flexible and complex conversation flows by allowing you to connect blocks and steps easily. Here’s how to manage connections:
Connecting Blocks and Steps:
Every step and block has a left inbound port for connections. To link blocks or steps, click on the right outbound port of one block or step and drag the line to the left inbound port of the target block or step.
Sequential and Direct Step Connections:
You can connect to an entire block, allowing the conversation to flow sequentially through all the steps within that block.
Alternatively, you can connect directly to a specific step within a block. This skips over other steps and jumps directly to that point in the flow.
Step-Specific Connections:
Certain nodes, like API Steps, offer specialized connection paths. For example, an API step may have both success and failure paths. Similarly, Capture nodes can handle multiple conditions, such as “No Match.”
Note:
While YourGPT Chatbot Studio allows you to connect any steps or blocks freely, it’s important to carefully plan your connections. For example, if you have an API Step, the outcome can lead to either a success or failure path. If you have steps directly below the API Step without considering these paths, those steps may be ignored because the API will only follow the path based on the result. Ensure your connections are aligned with the expected flow to avoid unintended behavior.
Editing and Configuring Blocks in Depth
Step Content Editor:
To configure a block, click on it to open the Step Content Editor on the right-hand side. This will allow you to adjust specific details for the selected step, such as responses, intents, or API calls.
You can seamlessly switch between editing steps by clicking on any other step in the flow, which will automatically update the editor.
Tip: Close the editor by clicking on an empty space on the canvas when you want to return to the broader view.
Related Articles
How to use Intents in Chatbot Studio?
This guide walks you through creating and using Intents to enhance your chatbot’s capabilities.
How to capture and store a user’s response?
This article provides a complete guide on capturing user responses, such as name, email, and more, and shows how to store and utilize them in your chatbot to create personalized and engaging experiences.
How to Add & Configure Text, Image, and File Messages in Studio
Learn how to send text, images, and files with your ai agent using studio.
How to Debug Flows and View Execution Logs in Chatbot Studio?
Learn how to debug your flows, check flow execution logs, and view logs within the Chatbot Studio
How to Set Up Conditions in AI Studio
Set Conditions to Understand What Information Users Are Looking For
How to create and use forms in AI Studio?
This guide will walk you through the process of creating and using forms to improve the user experience with your AI agent
