How to make API calls with dynamic parameters.
The API Call node allows you to:
Call external APIs.
Store the response data in flow variables for use in your flow.
Pass dynamic parameters like user details (email, order ID, etc.) using flow variables and entities.
Step 1: Capturing Data (if required by the API)
Objective: Capture dynamic user information for API requests (e.g., email, order ID).
Capture Node:The capture node allows you to extract useful information from the user’s message. You can capture the entire user response and store it in the Flow.last_response variable or another custom variable.
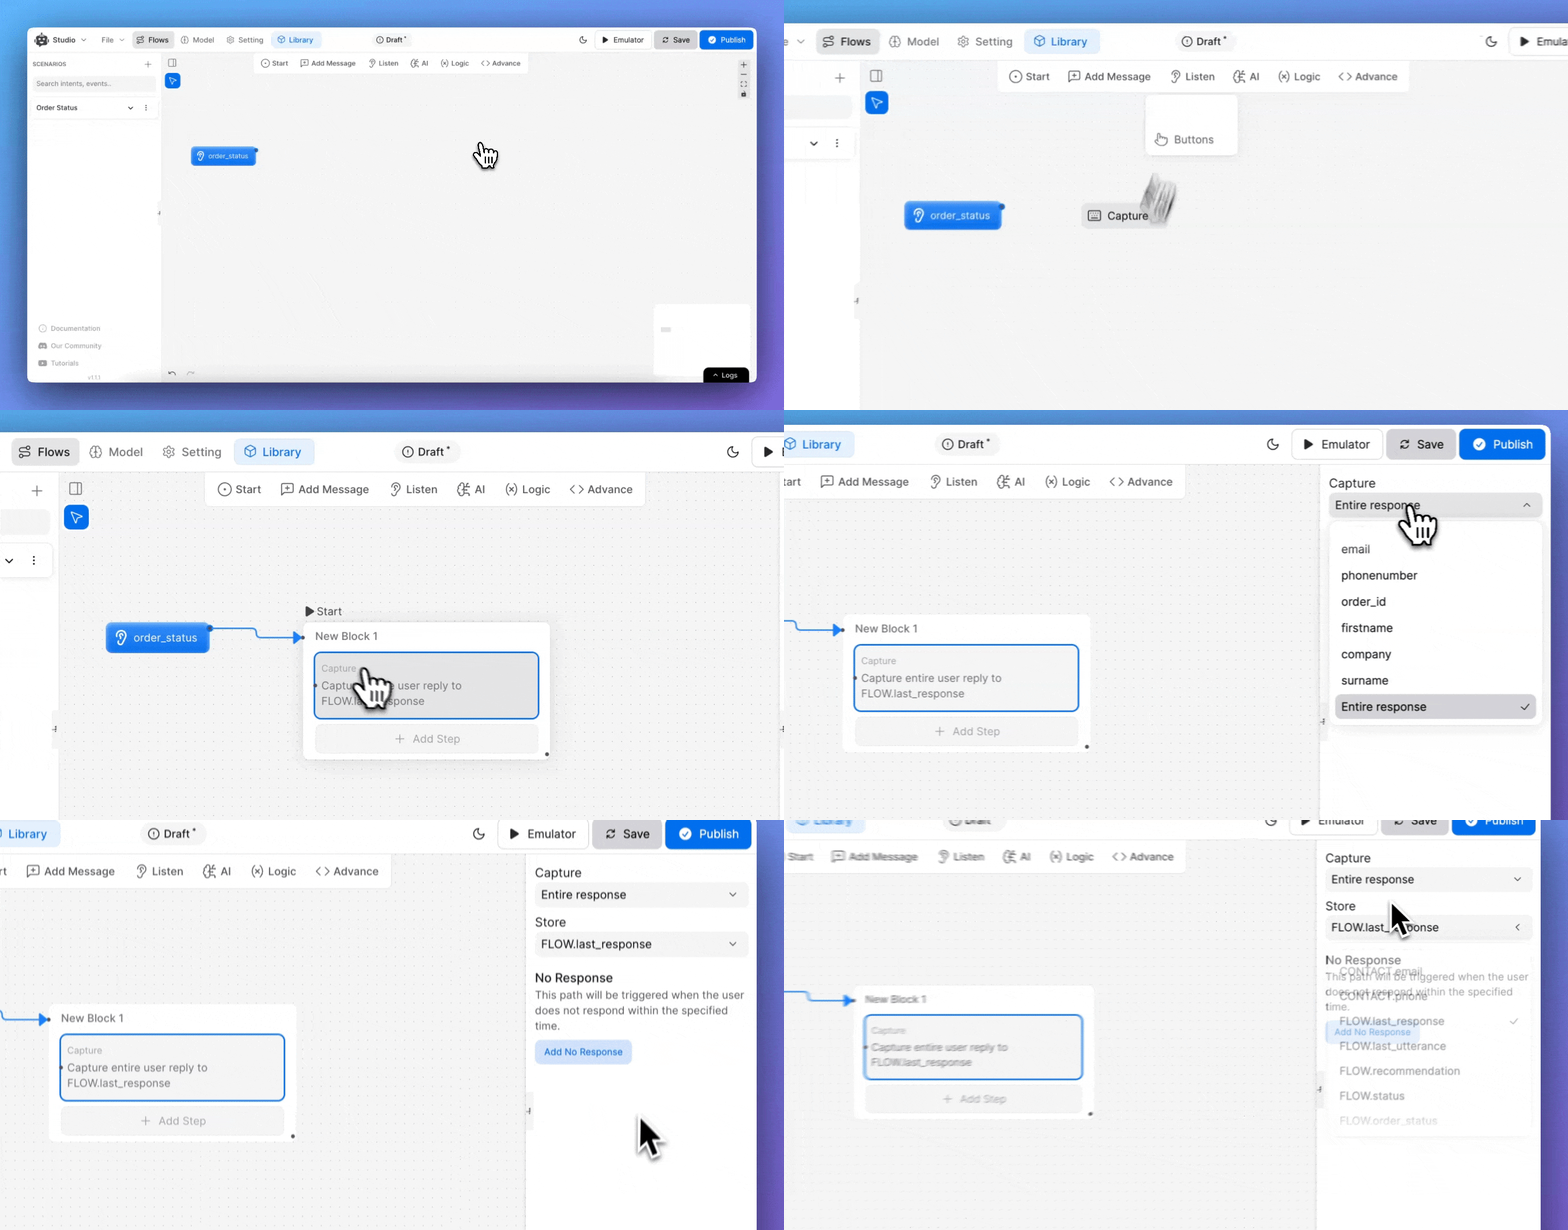
Using Entities:
Entities provide a smart way to capture specific information (e.g., email, order ID).
For example, if the user says, “My order ID is O1212,” the chatbot extracts O1212 as the order ID.
Entities are stored in flow variables and accessed using {{FLOW.entityName}}.
Example:
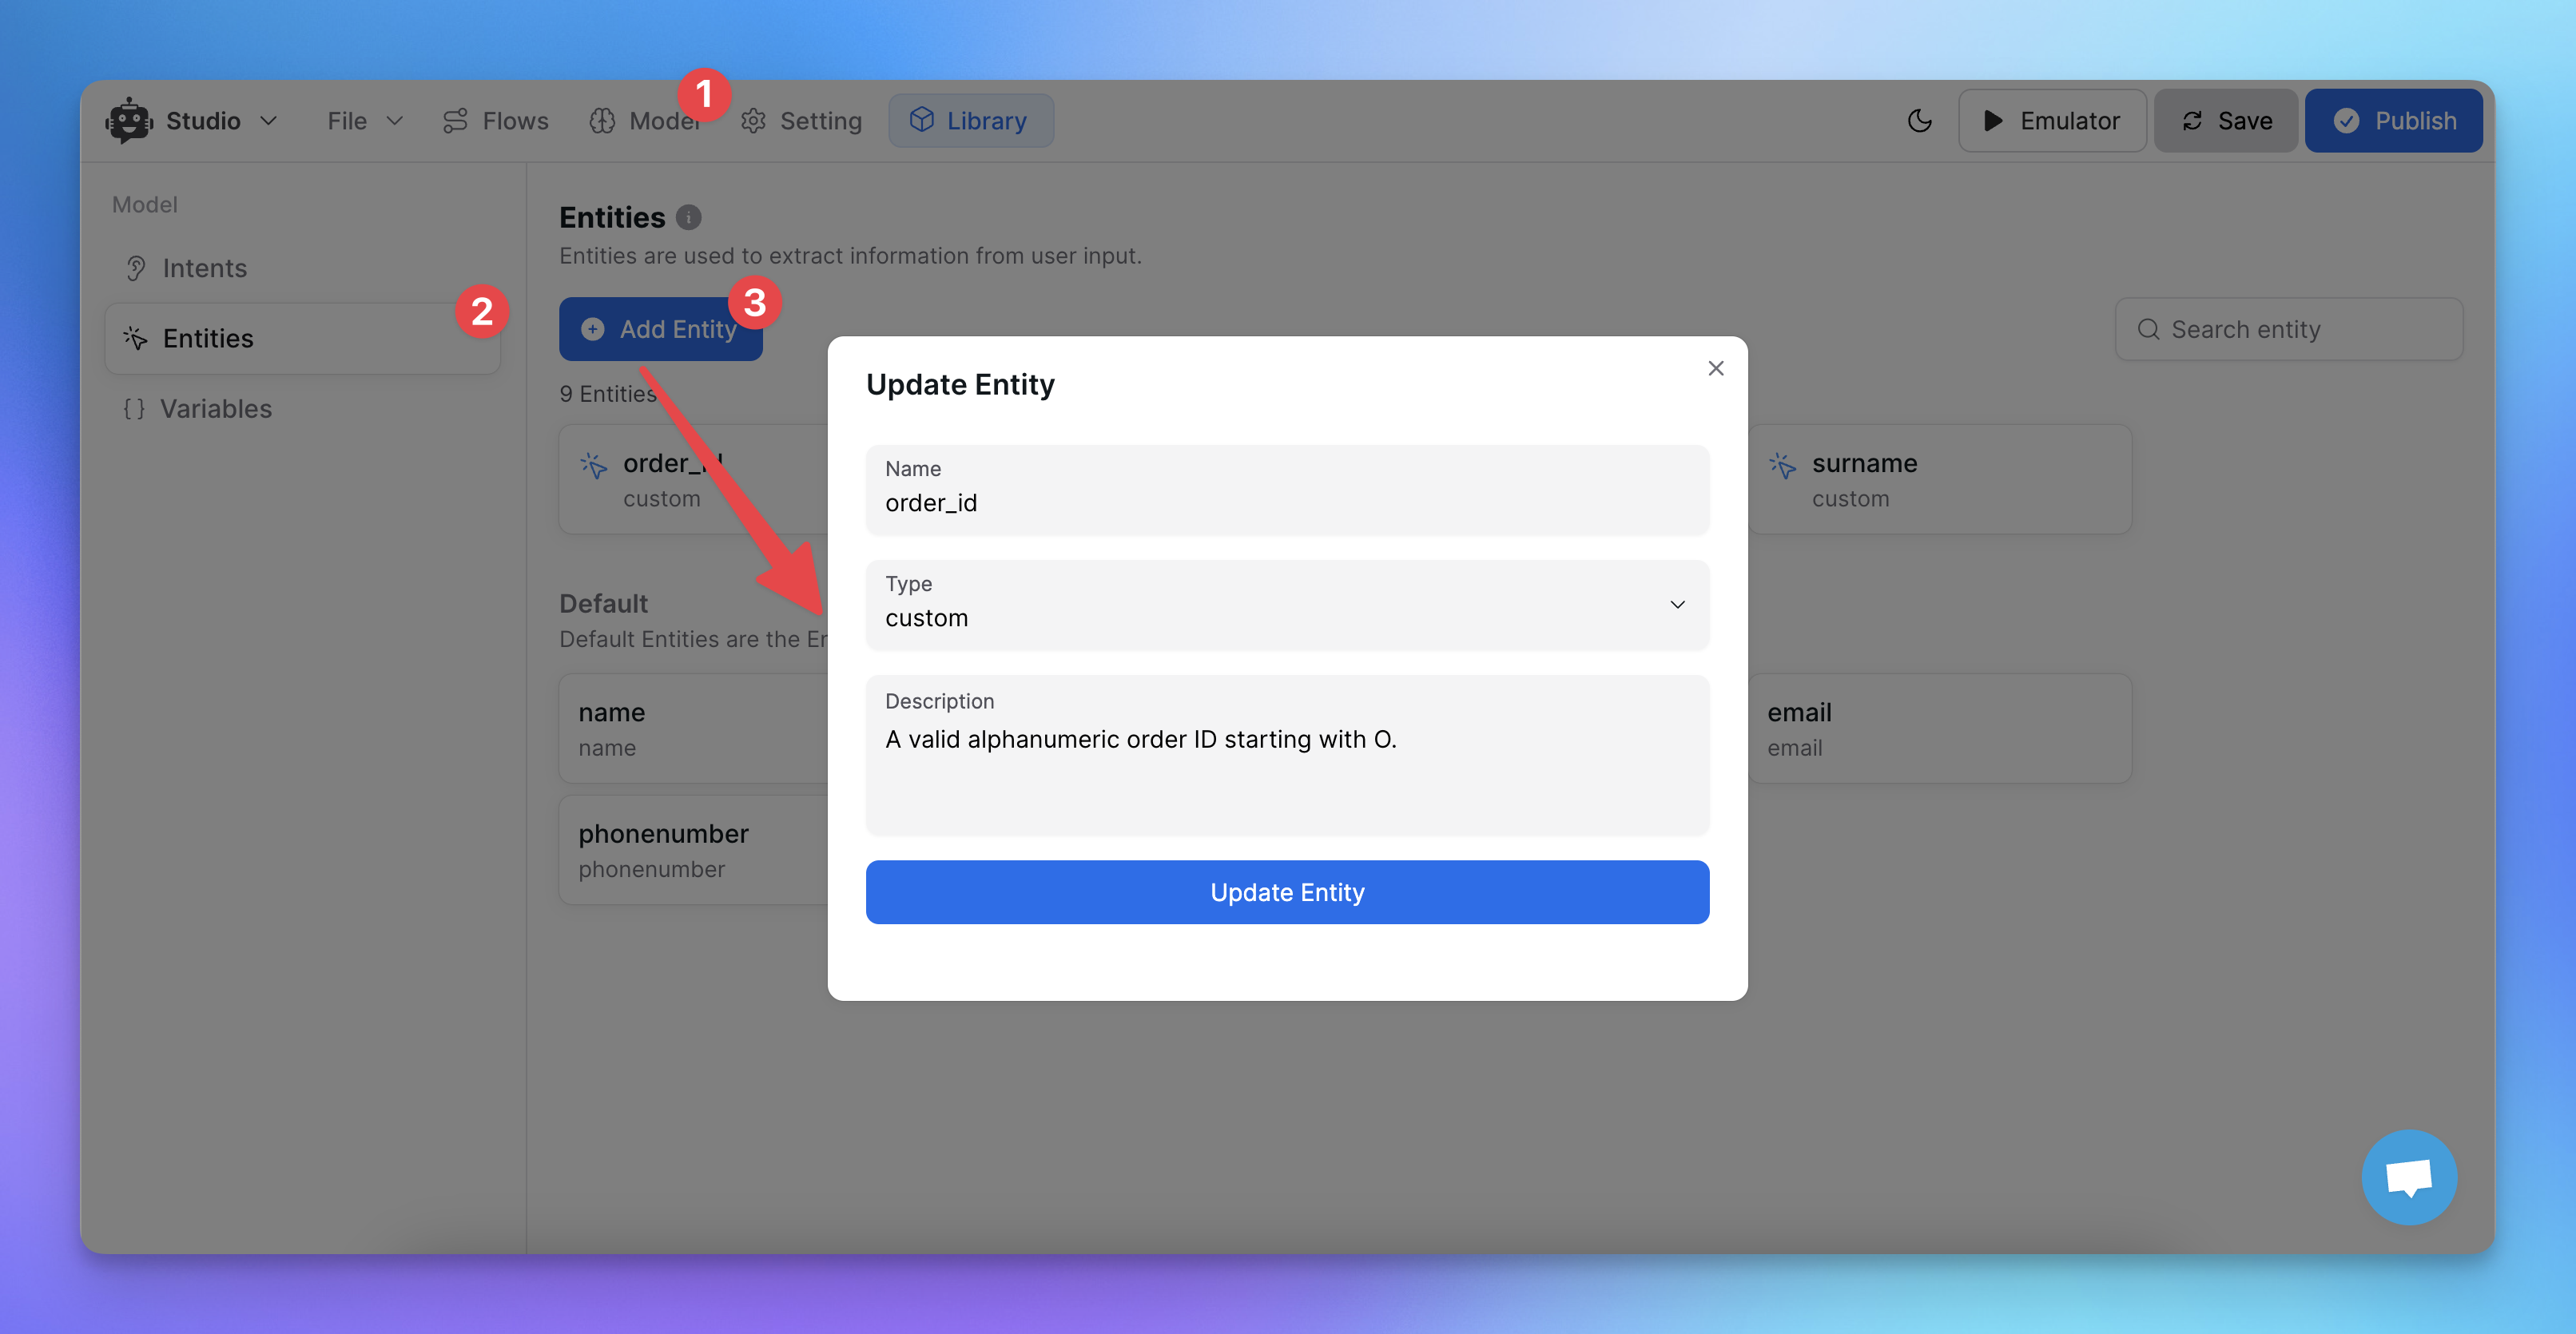
Create an entity for order_id.
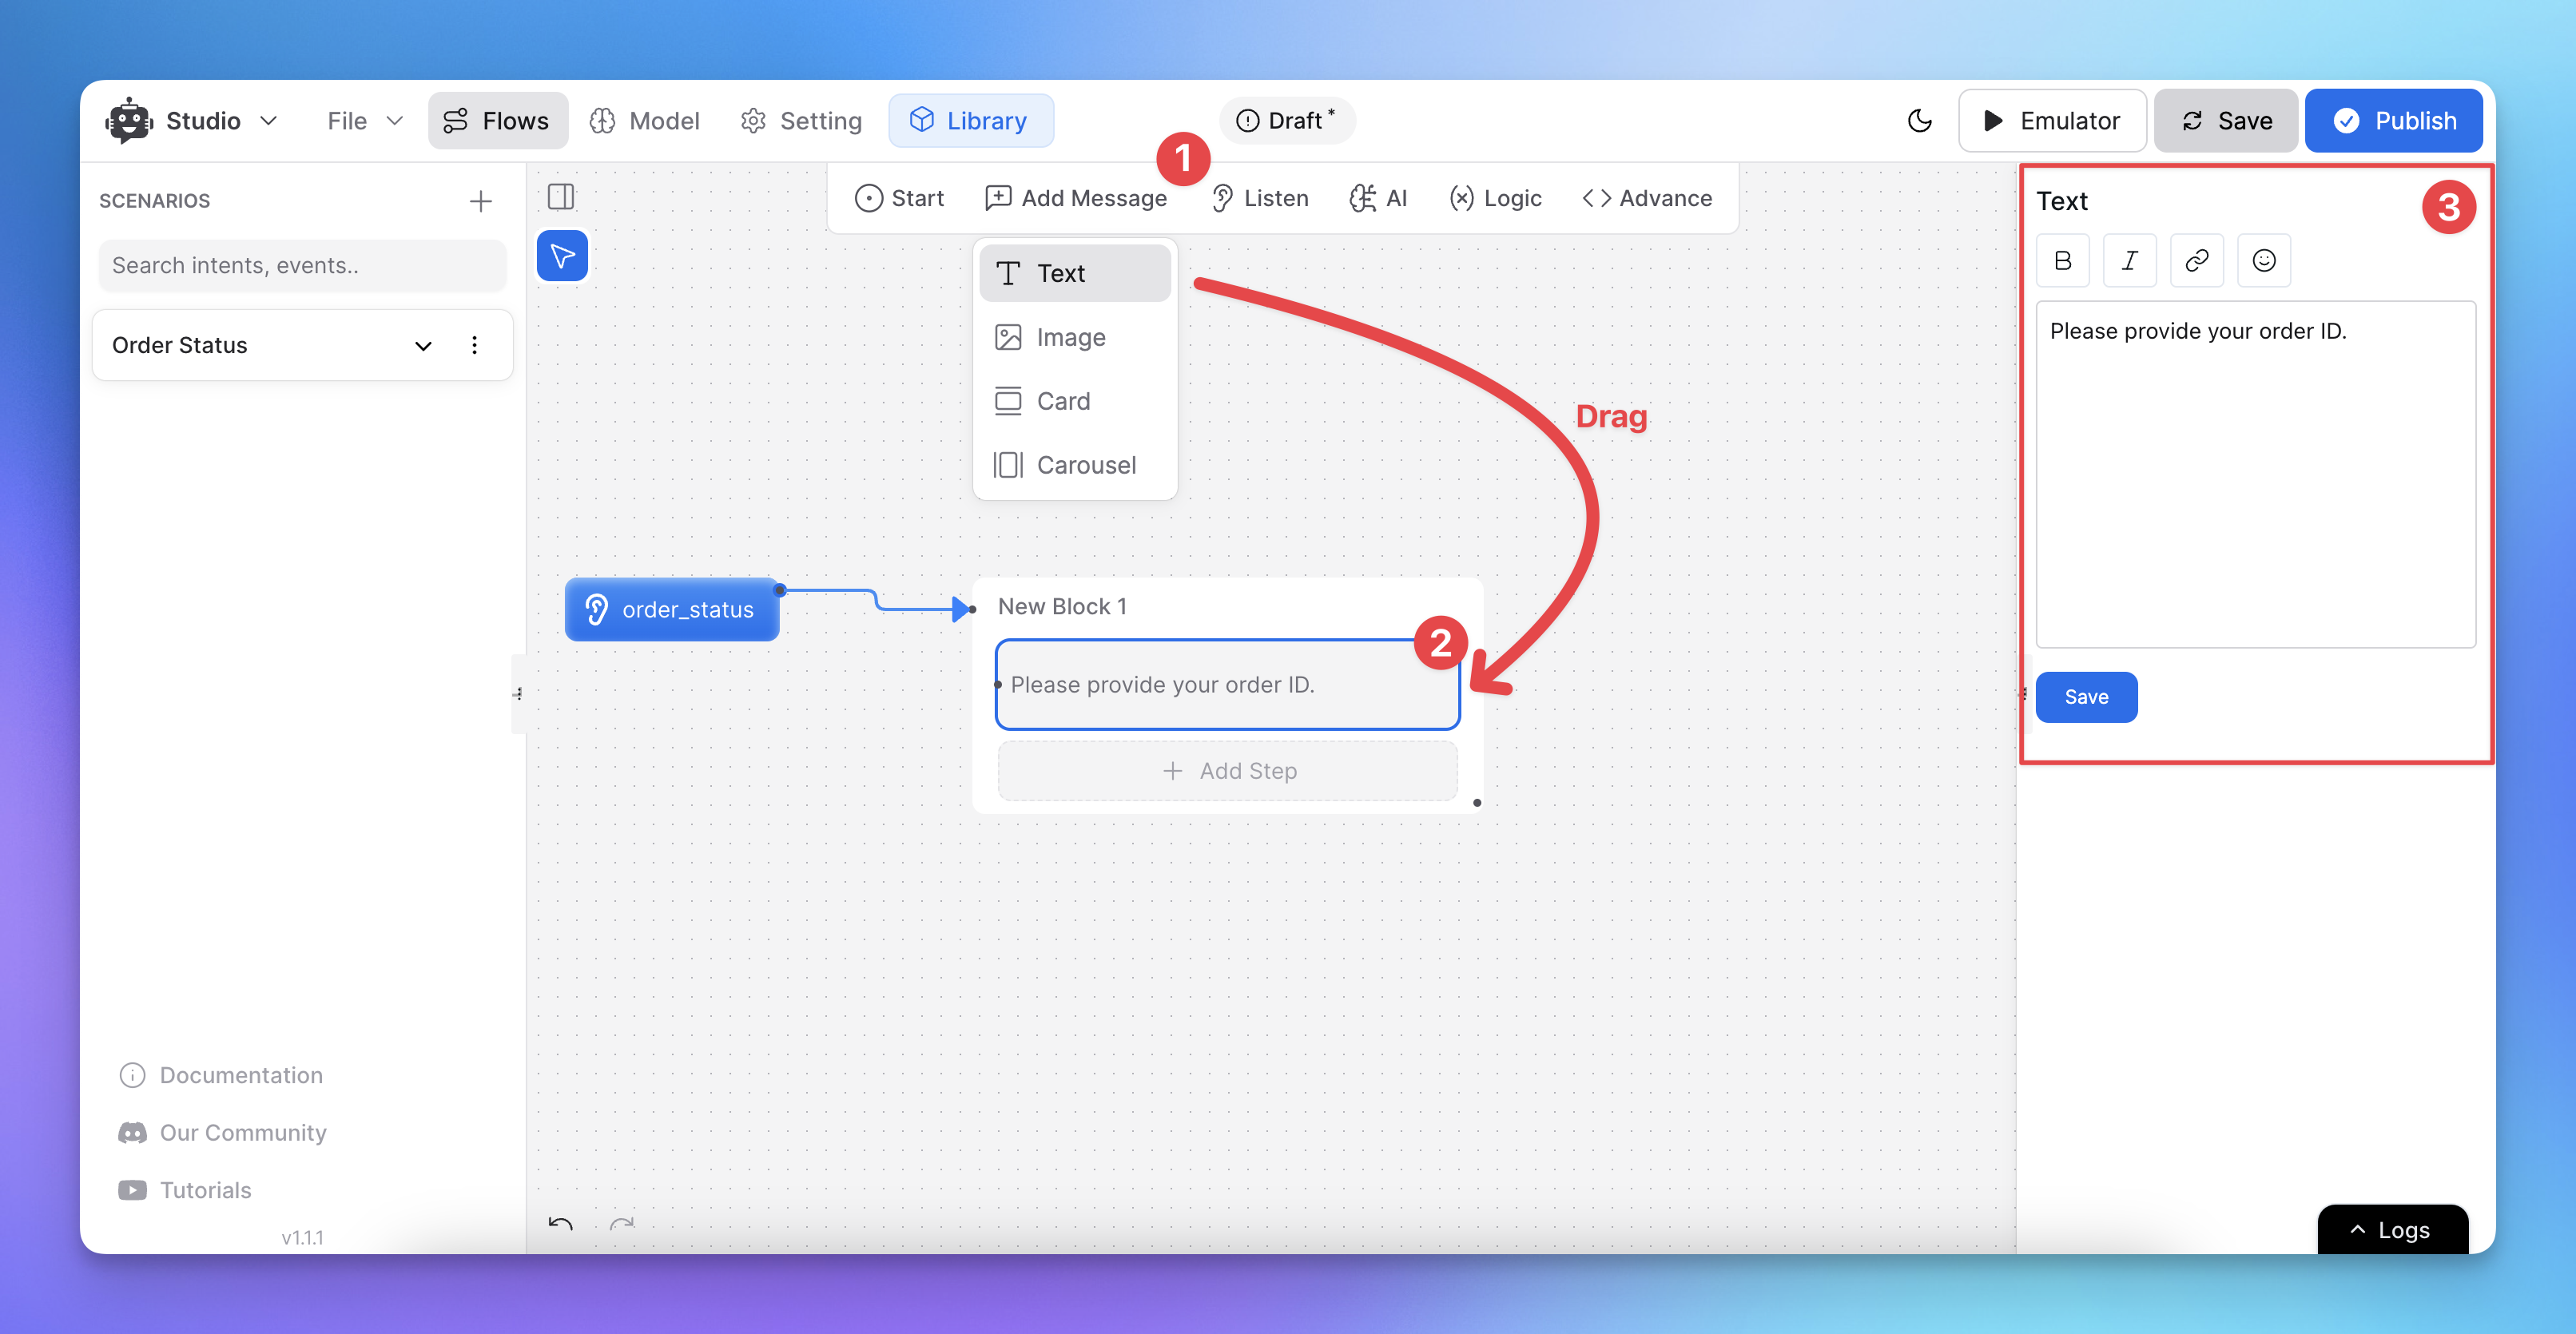
Add a text message prompting the user to provide their order ID.
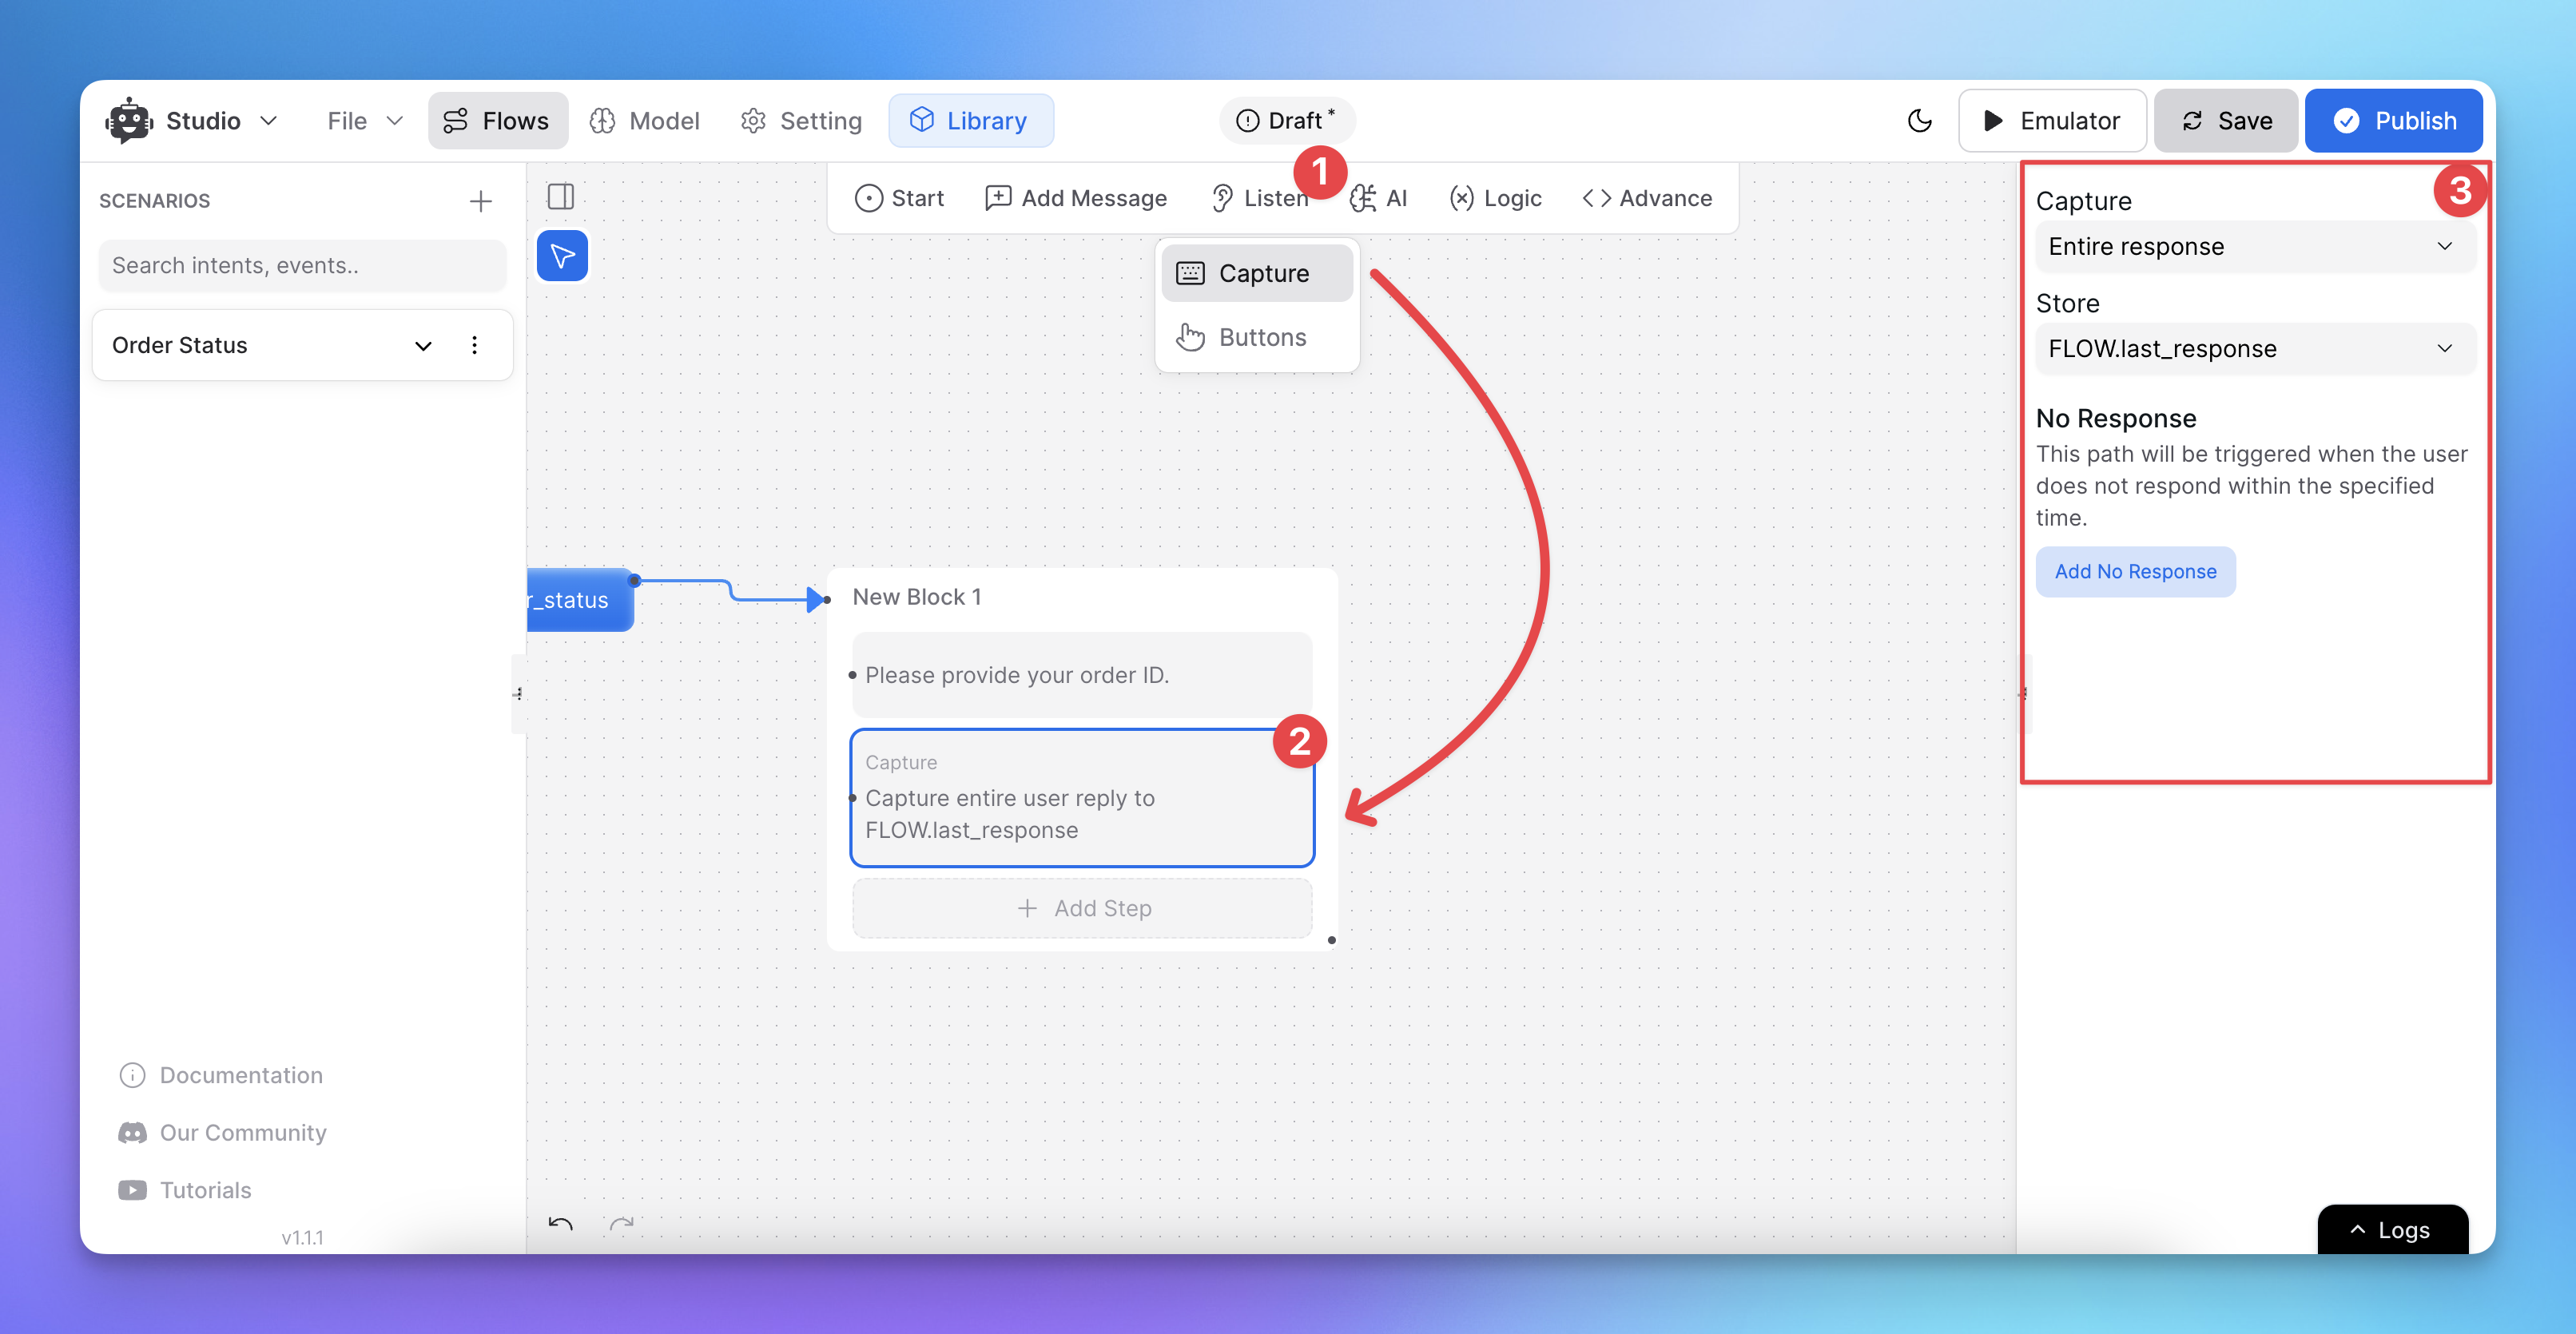
Attach the Capture node and select the order_id entity.
Test it by displaying the captured order_id using {{FLOW.order_id}}.
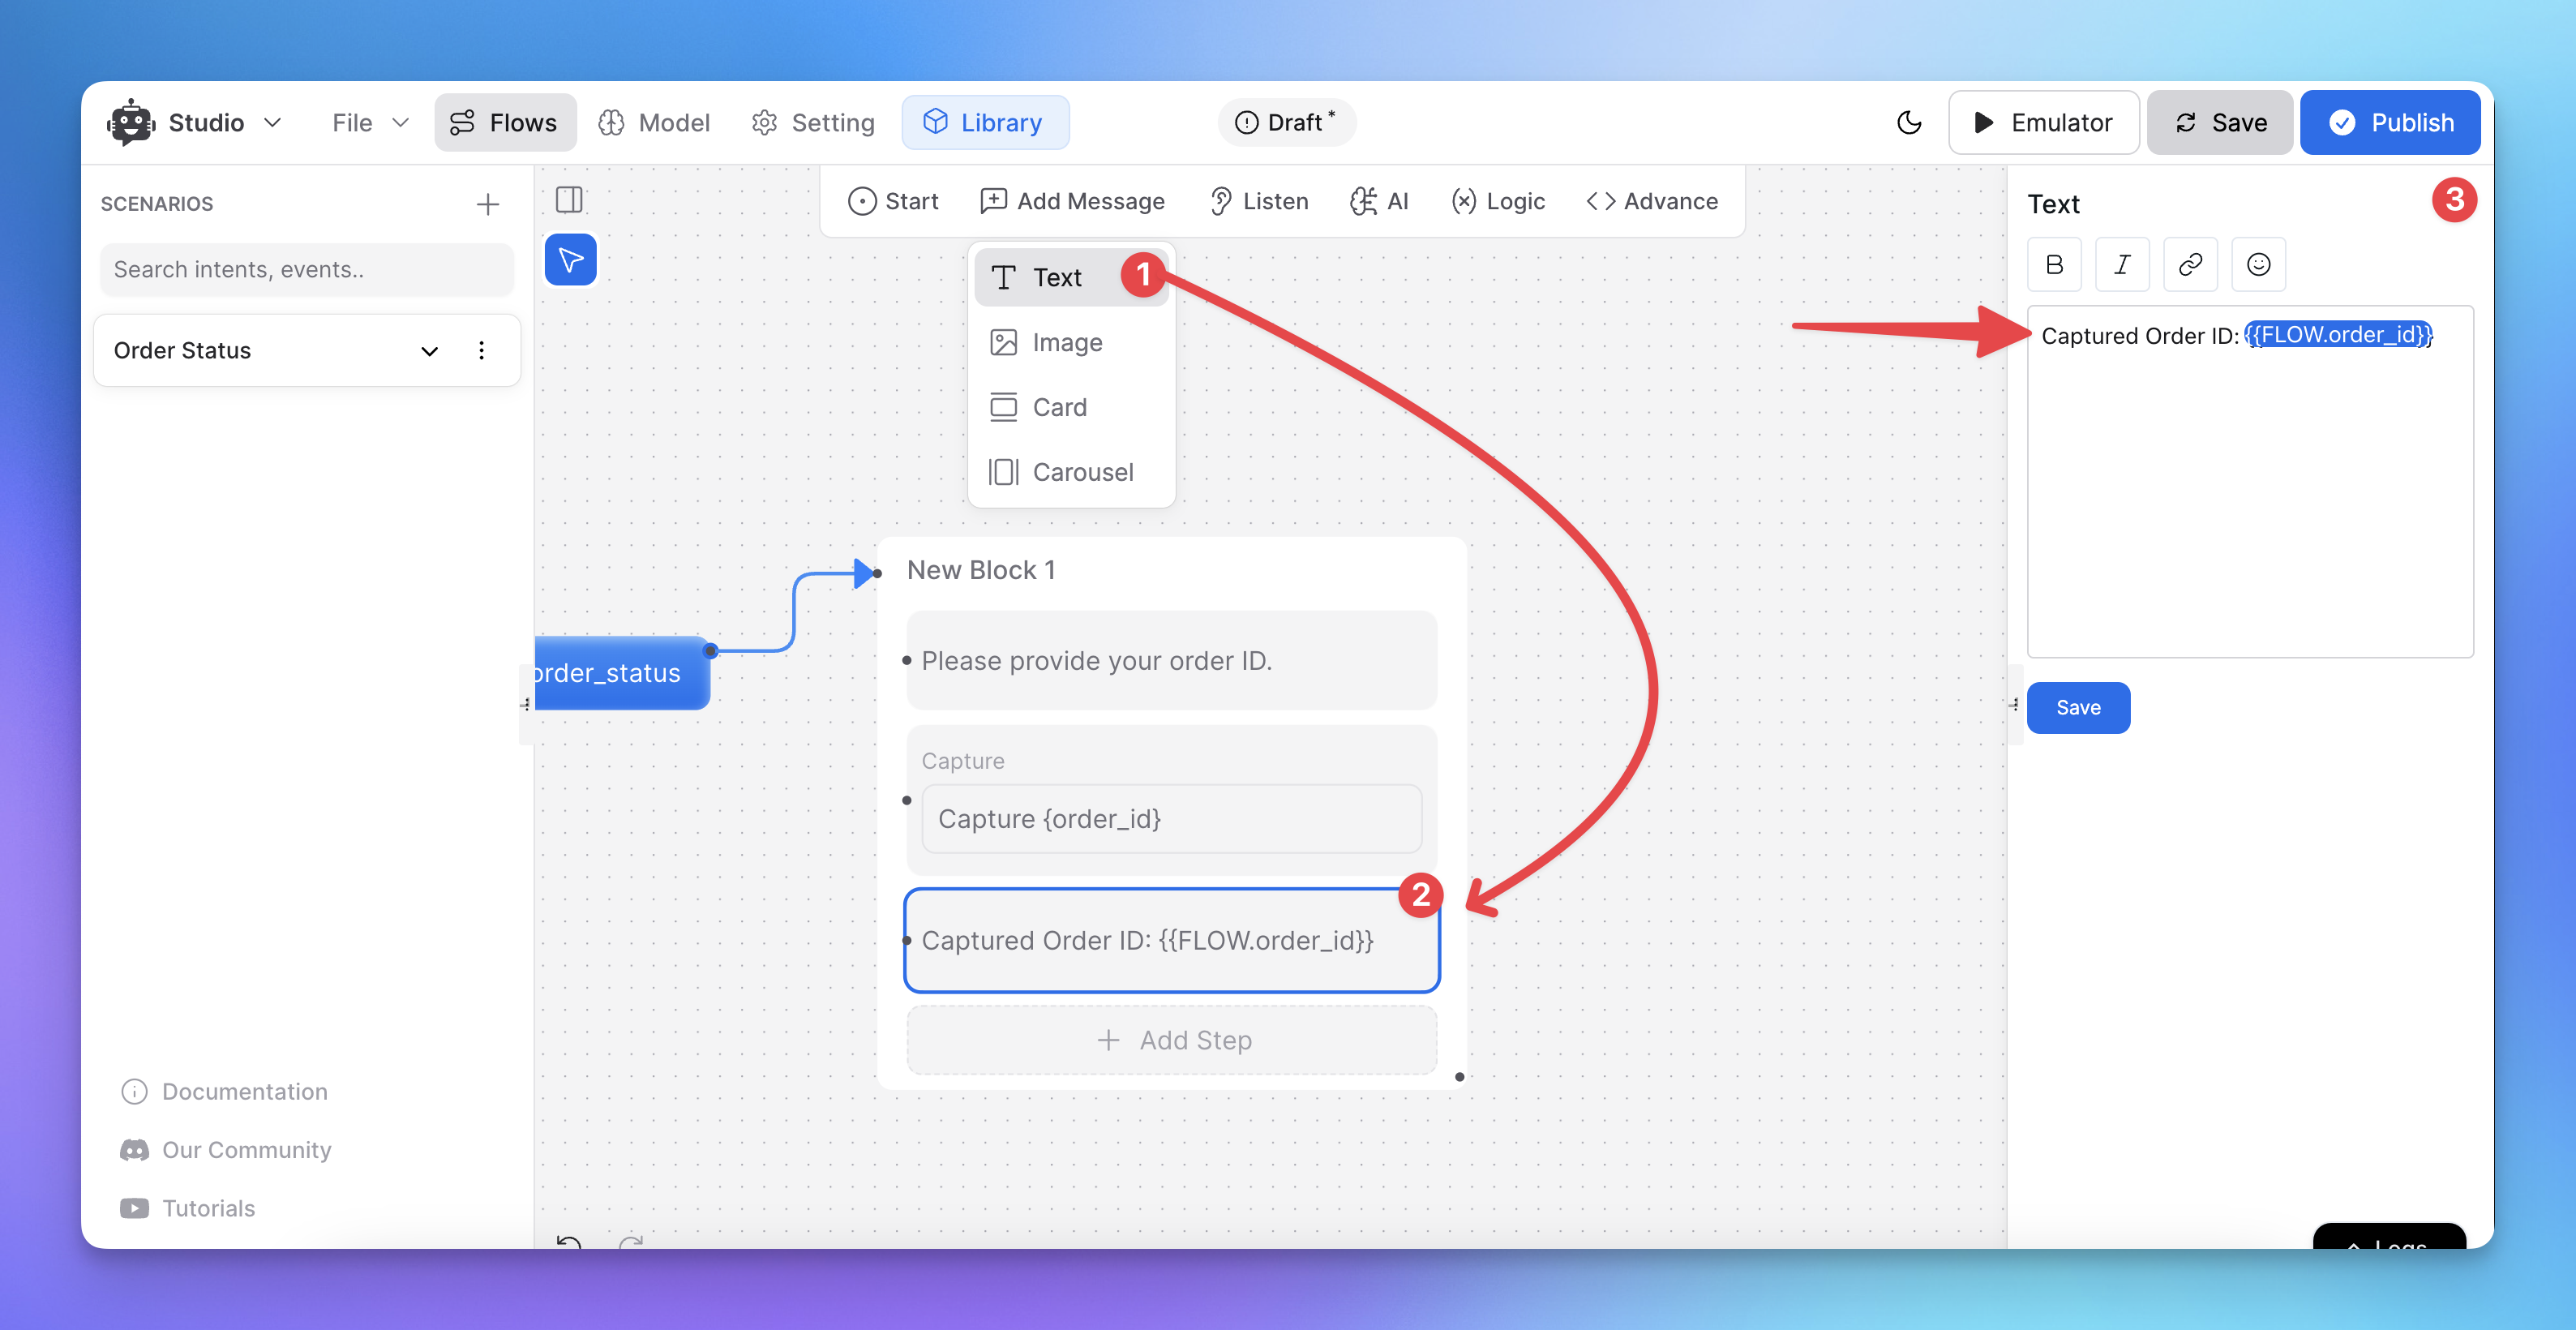
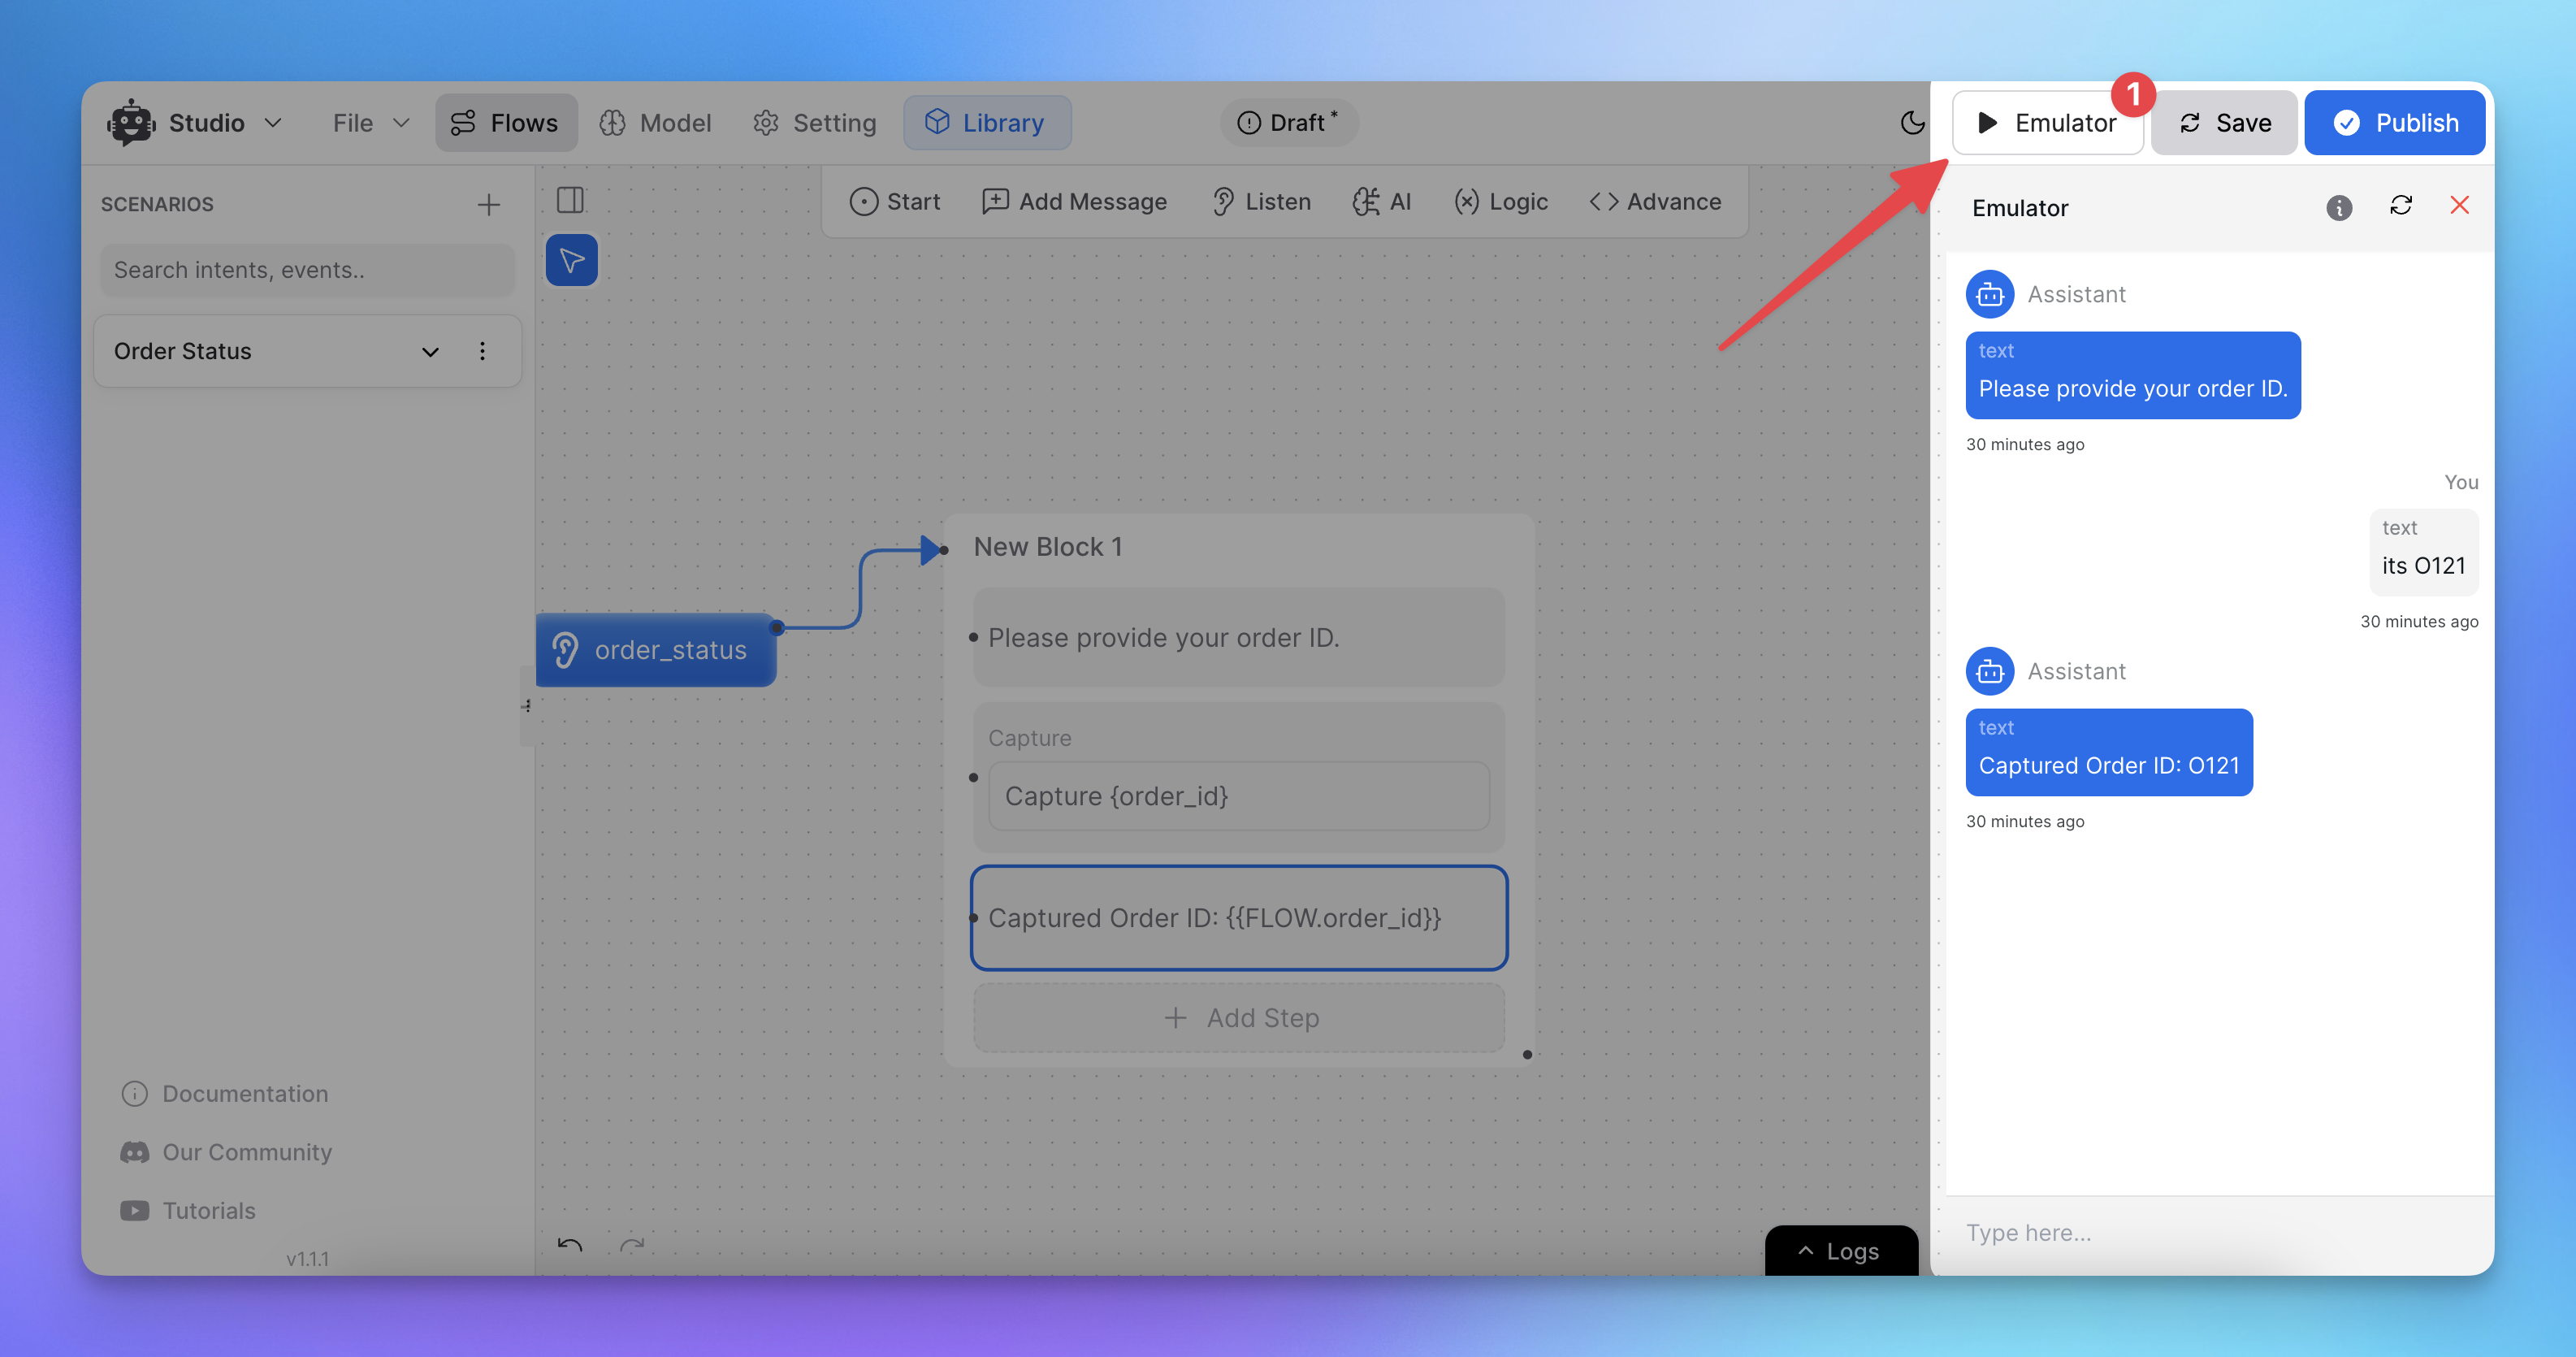
Learn more about capturing user information: How to capture and store a user’s response?
Step 2: Configuring the API Call Node
Add the API Call Node:
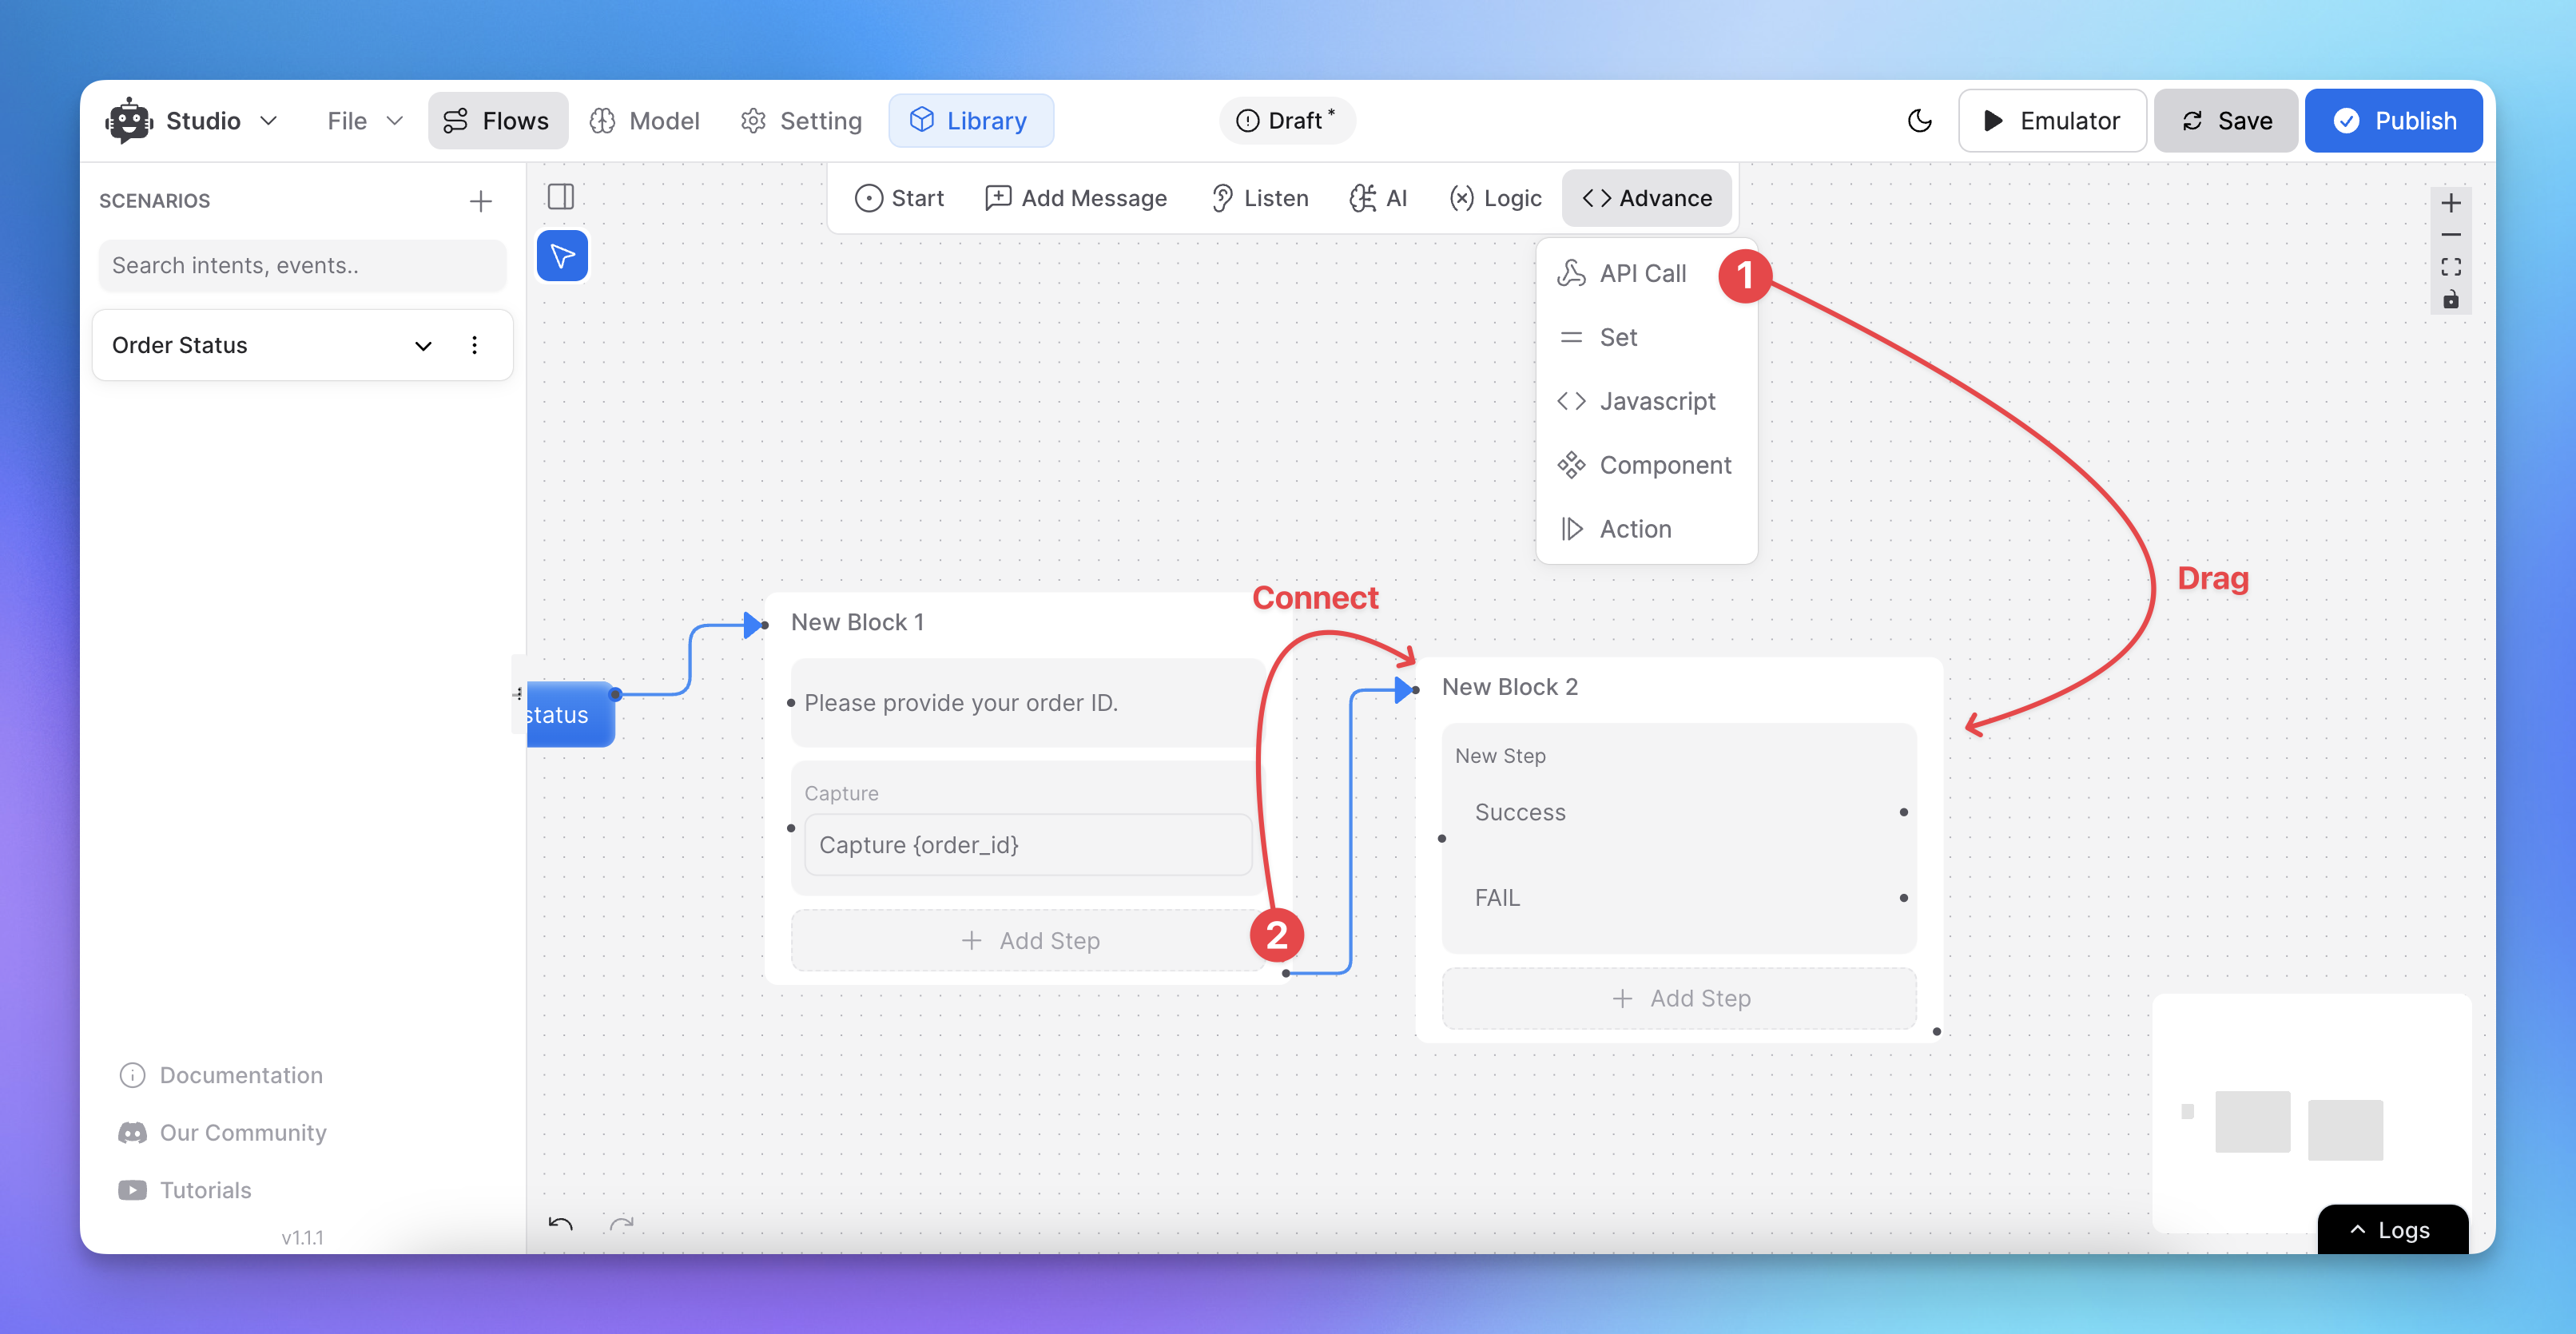
Click the API Call node to configure API request details such as:
Request type (GET, POST, etc.).
Endpoint URL.
Headers and parameters.
You can use dynamic variables for any configuration field.
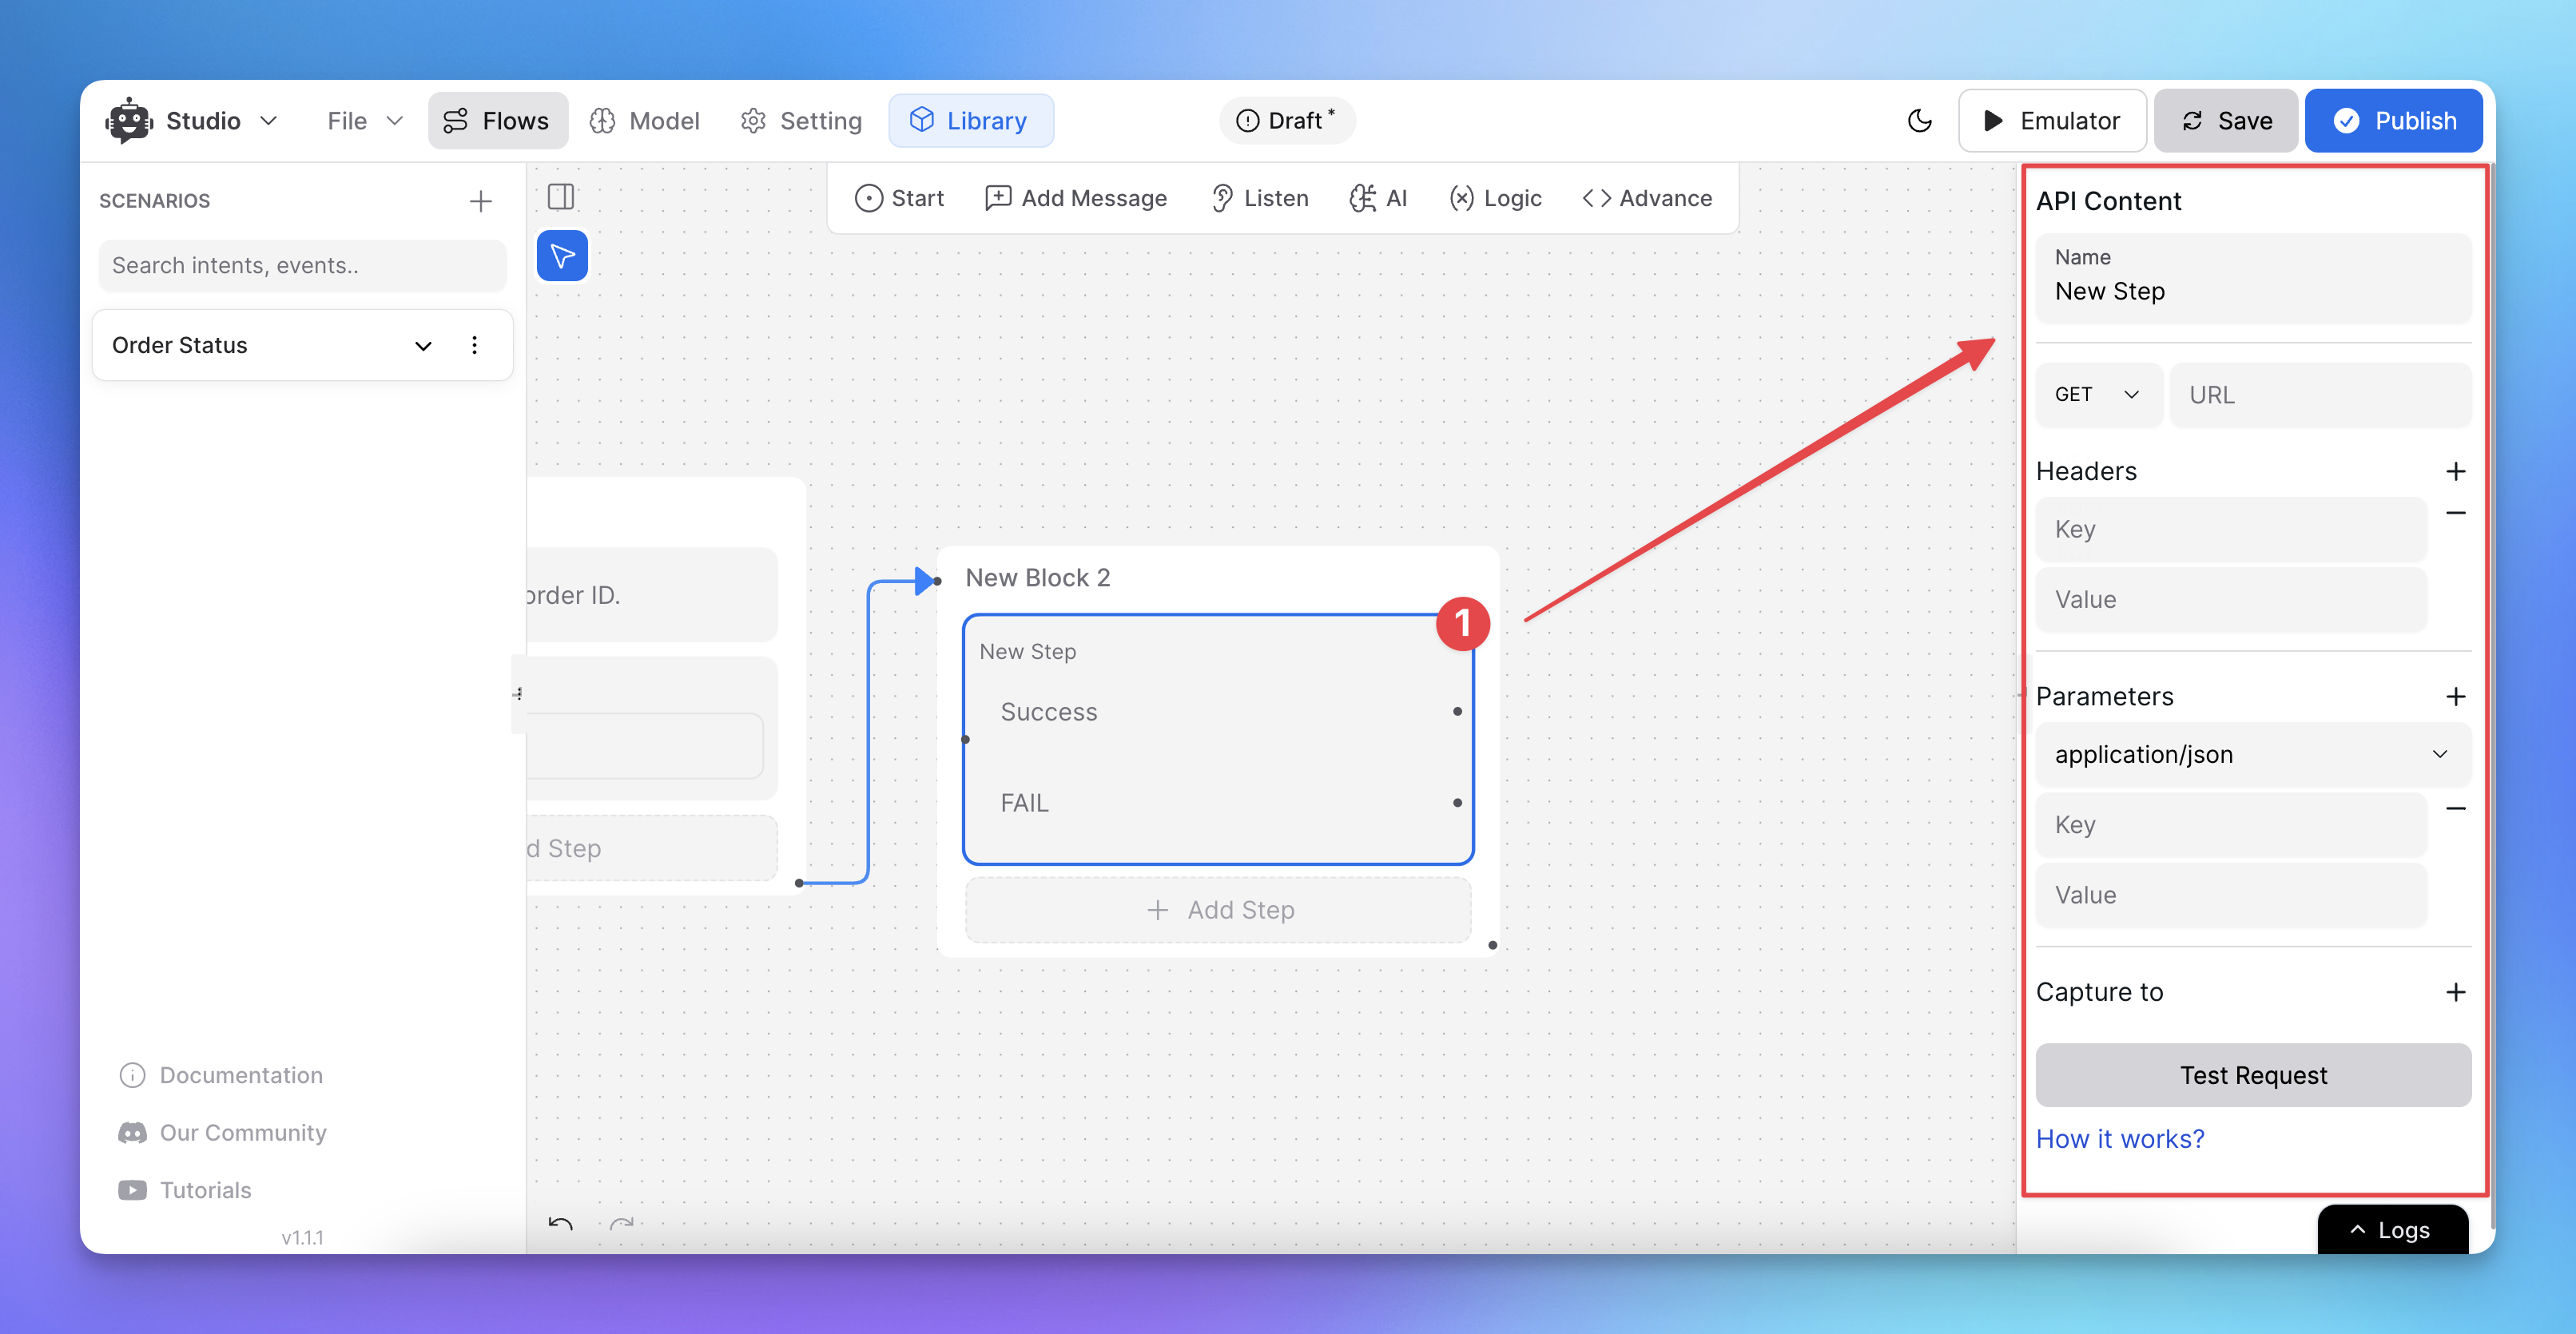
Using Dynamic Variables:
In the parameters, use the captured entity order_id by replacing it with {{FLOW.order_id}}.
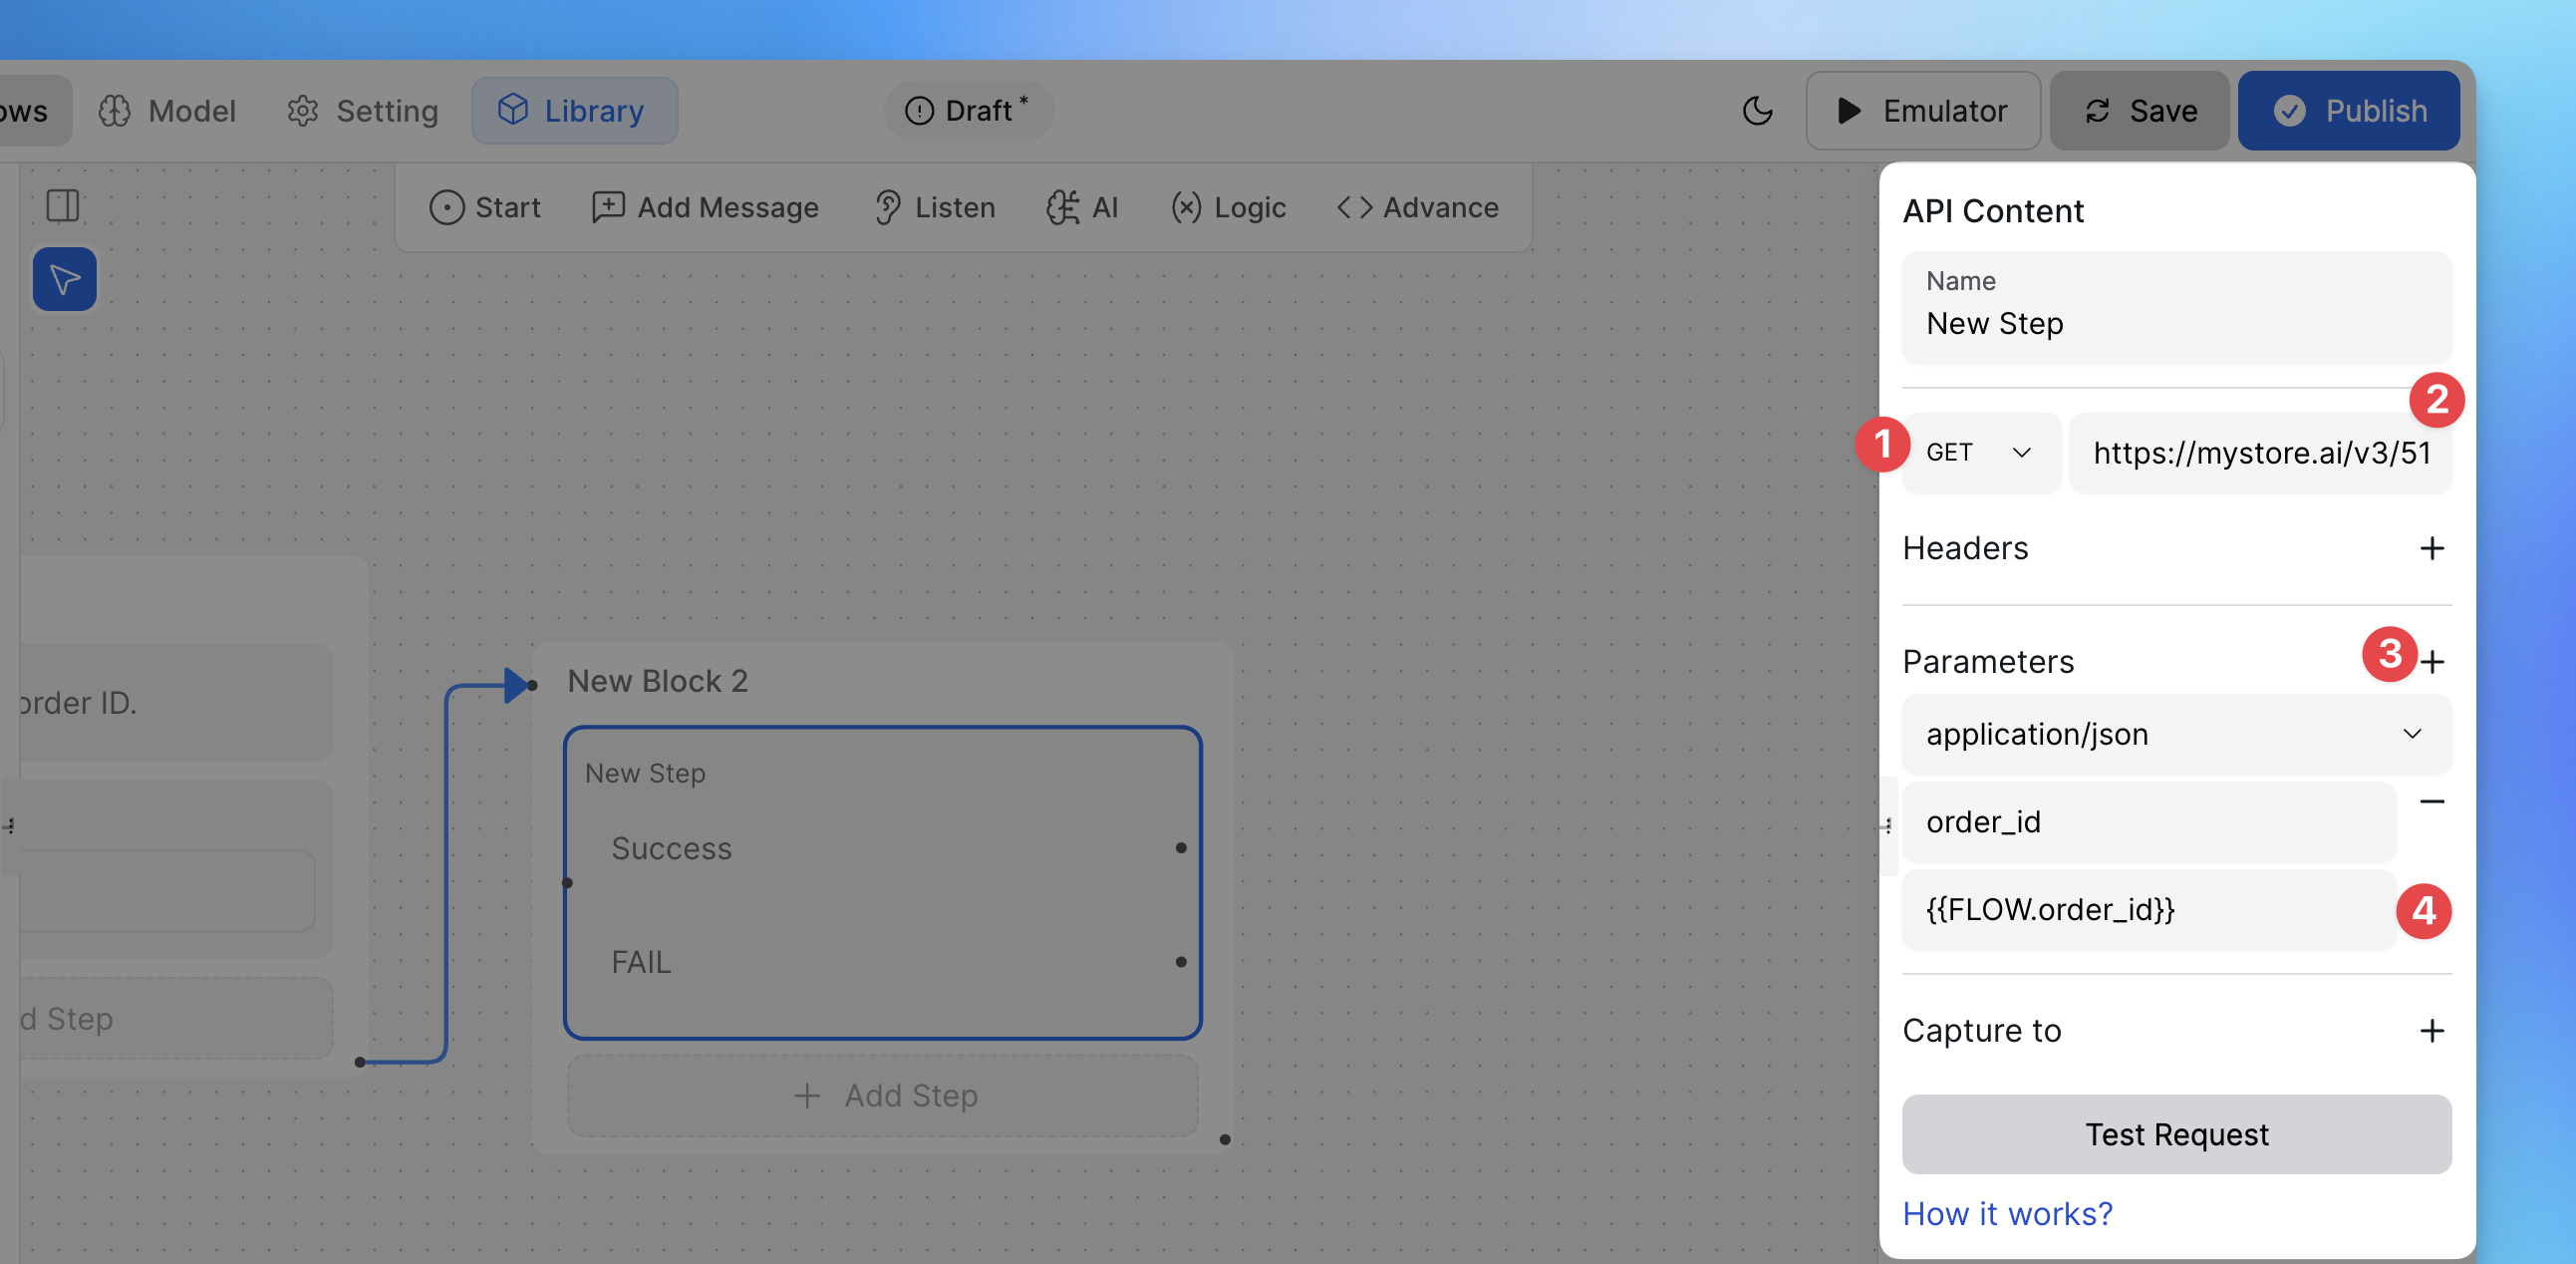
When the API Call node runs, the dynamic variables are replaced with real data from the flow.
Testing the API Call:
You can test the API call using the built-in testing feature.
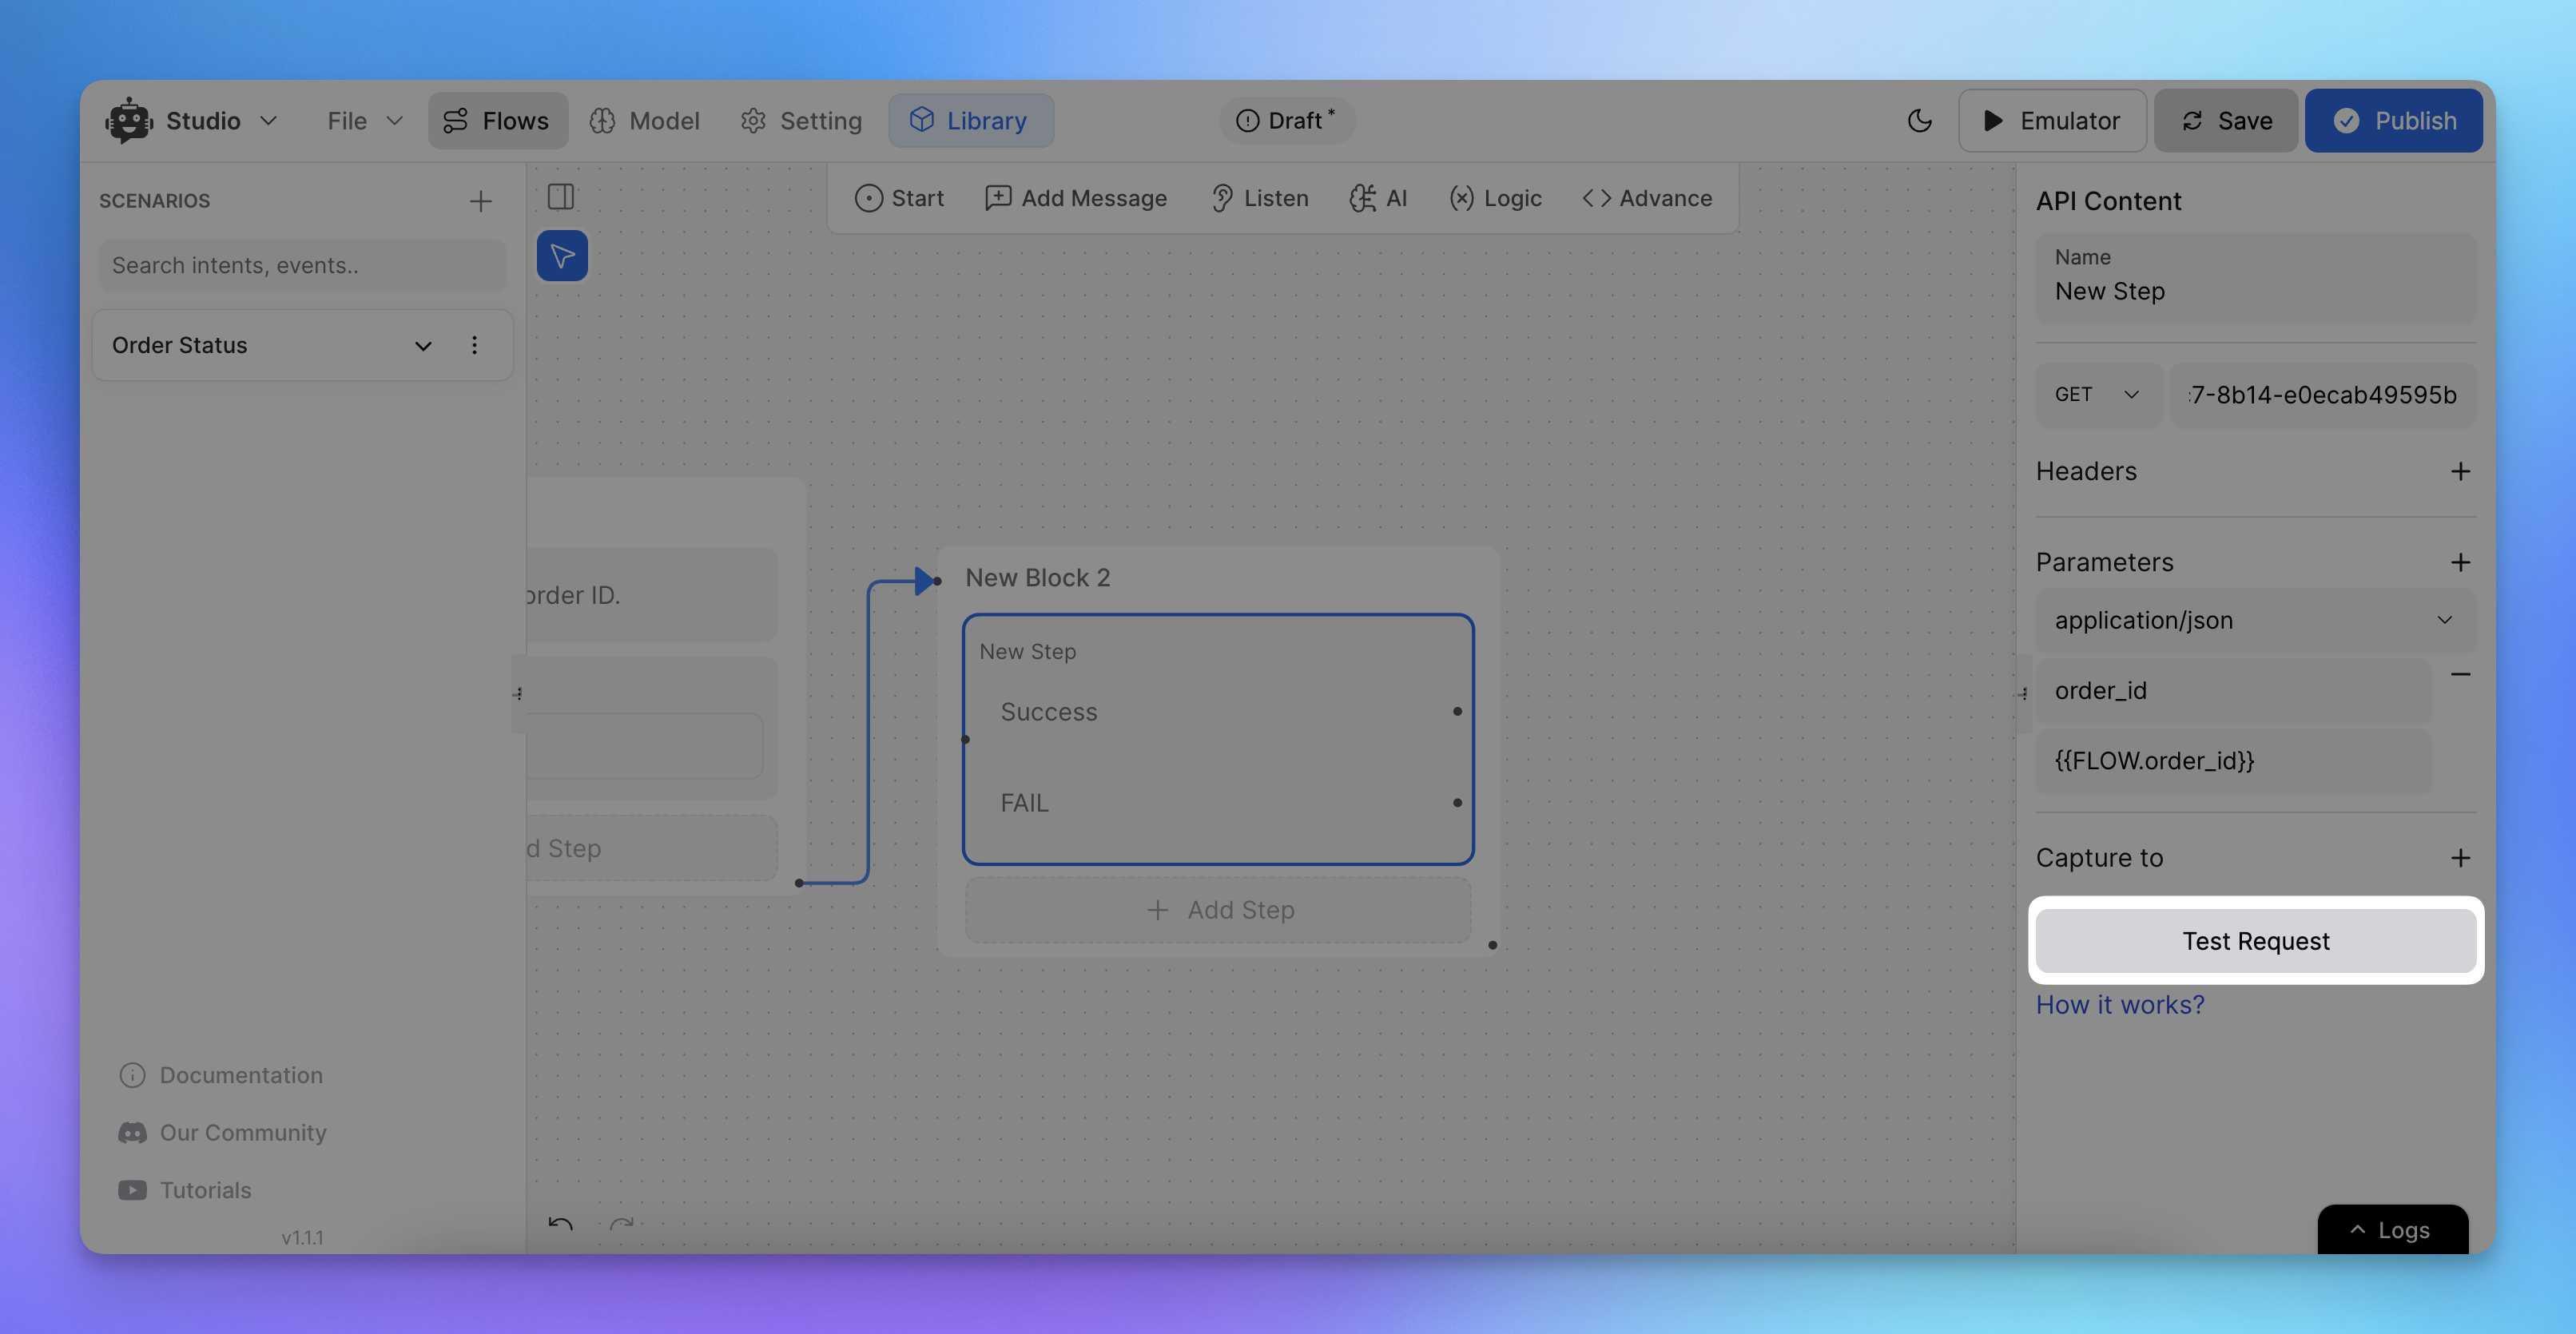
If your request includes dynamic variables, make sure to manually input values during testing.
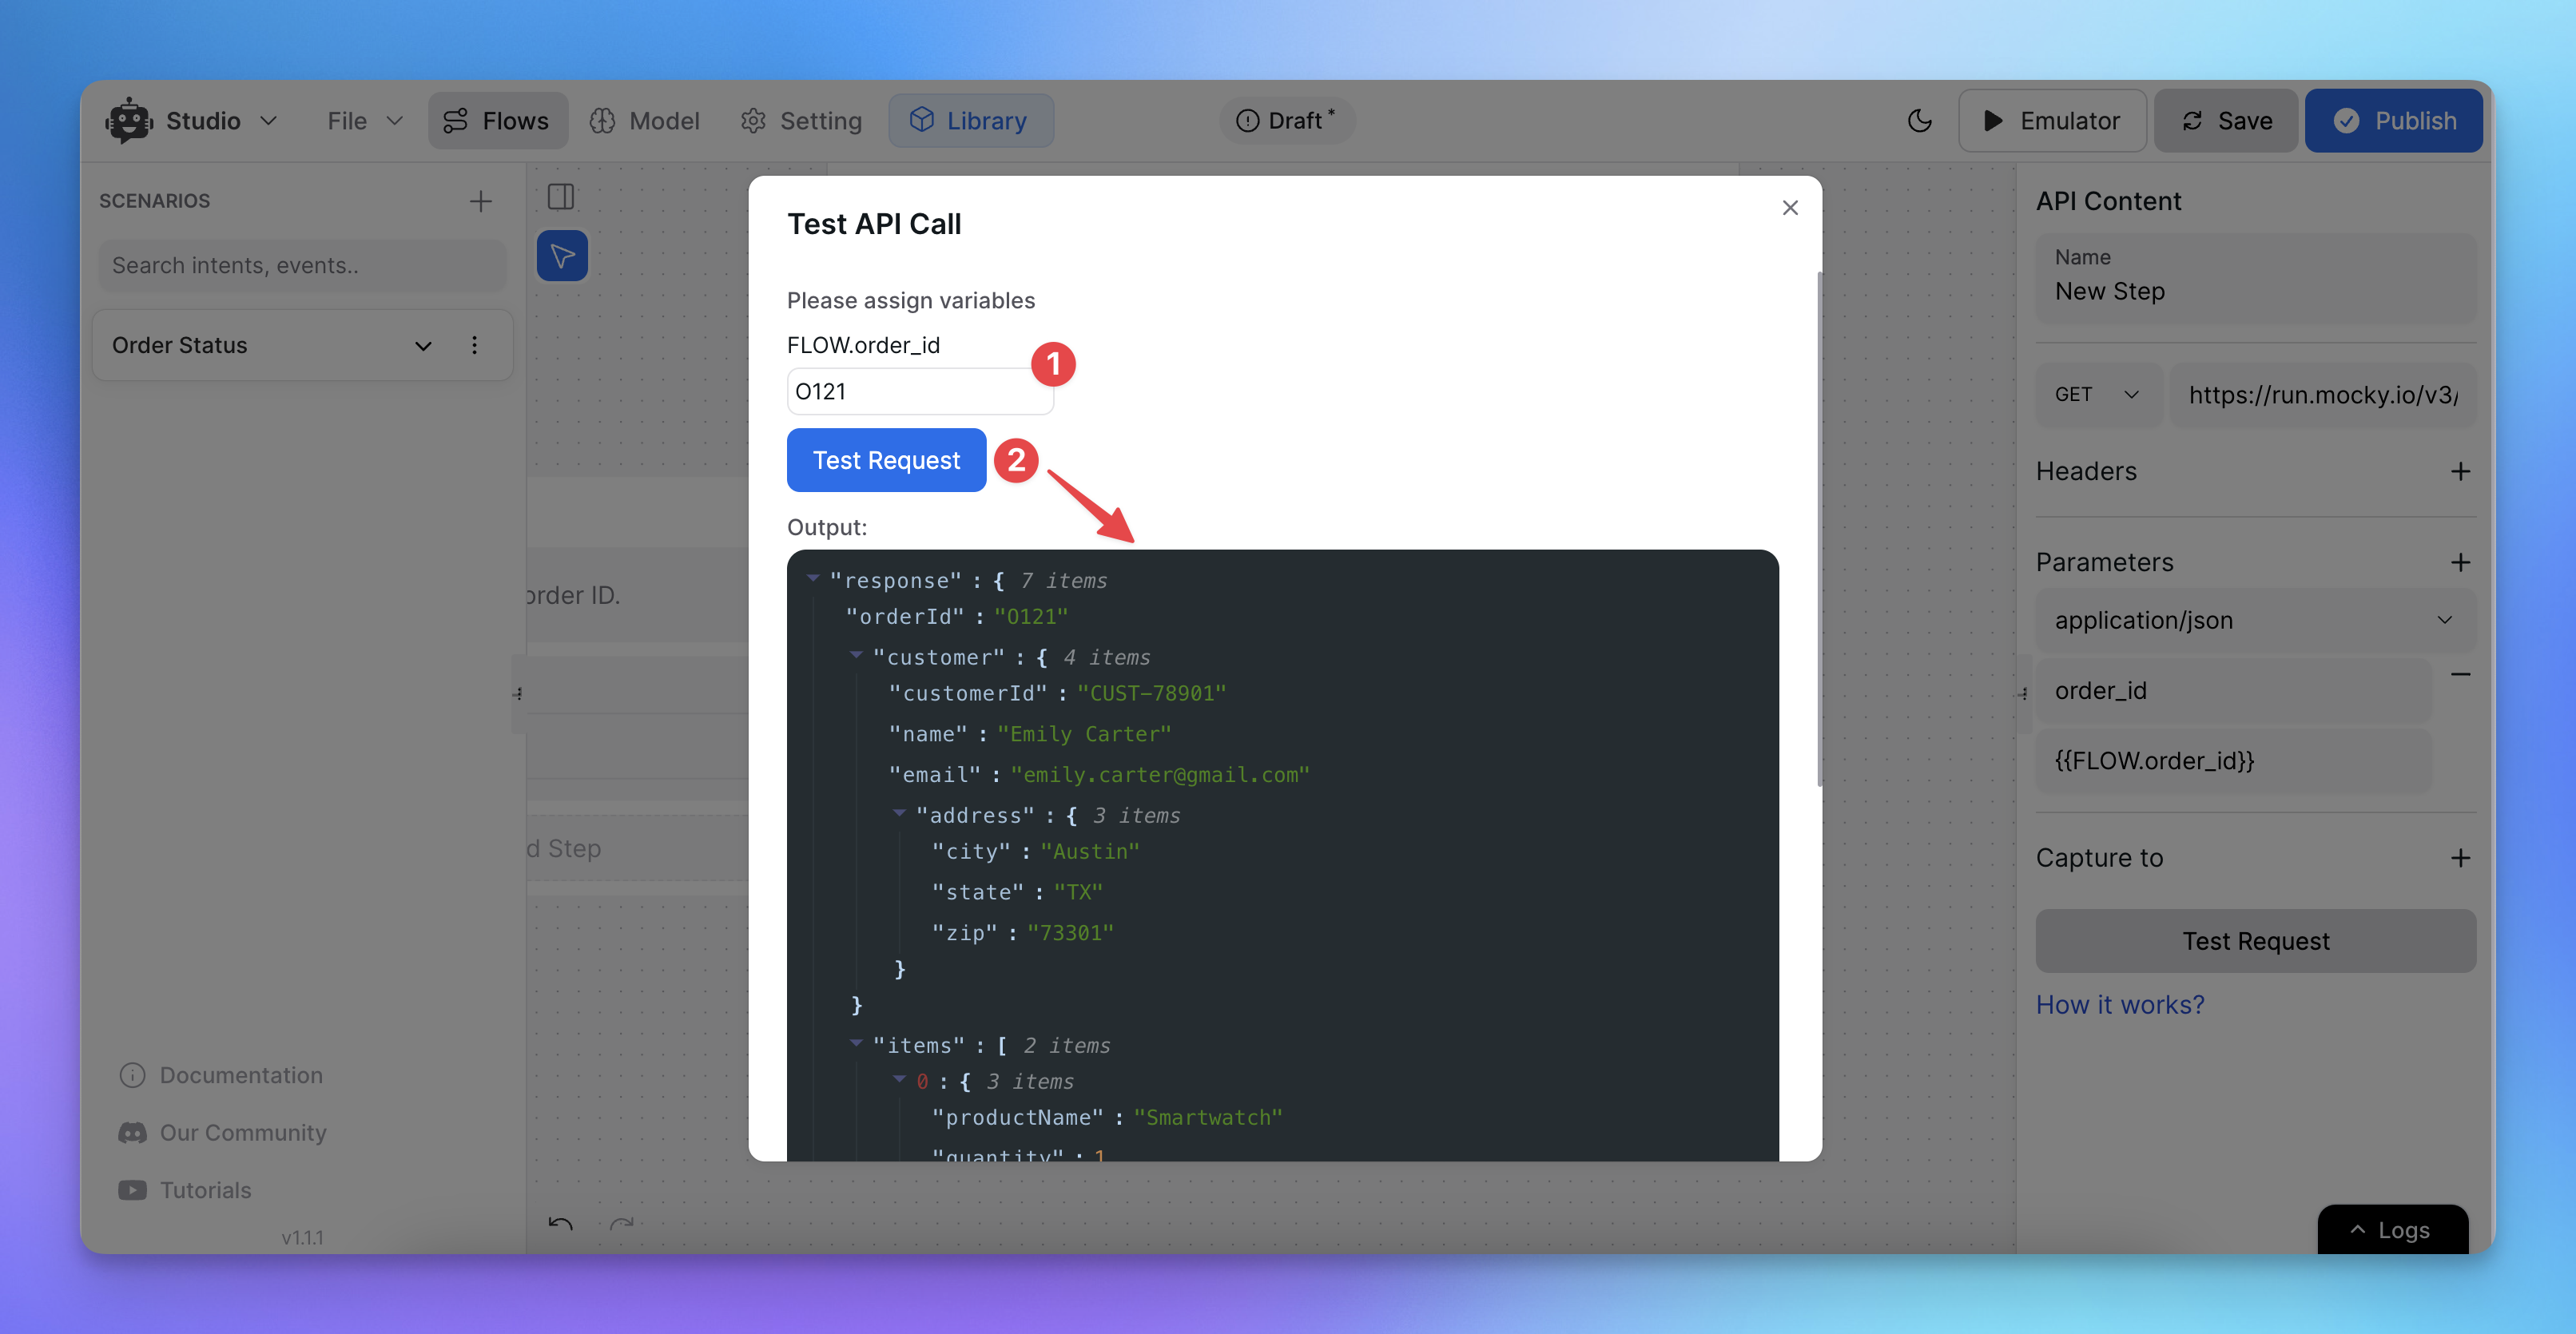
Step 3: Handling the API Response
Storing API Response:
Store the API response in a flow variable. If the response is in JSON format, specify the exact path of the data you need using object dot notation (e.g., response.data.order_status).

API Call Success and Failure:
The API node has two paths: success and failure. Connect your next node to the appropriate path to manage the outcome of the API call.

Logging the Response:
After a successful API call, log or display the captured response. You can now use this data to personalize the chatbot’s responses or display user-specific information.

Step 4: Using the Logger for Debugging
Accessing Logs:
While testing your flow using the emulator, you can open the logs from below to see what’s happening. This is useful for debugging any issues that arise during your API calls or capturing data.

Session Logs:


Notes and Tips:
Use Flow Variables: When capturing dynamic data, make sure to store it in flow variables so it can be used across the flow.
Testing Dynamic Values: Always provide placeholder values during testing if you’re working with dynamic variables.
Handling Failures: Ensure that you connect failure paths to handle unsuccessful API calls and guide the user appropriately.
Entity Management: Use the entity manager to define custom entities based on your API needs.
Related Articles
How to use Intents in Chatbot Studio?
This guide walks you through creating and using Intents to enhance your chatbot’s capabilities.
Flow : Scenarios, Blocks, Steps & Connections
This article fully details how steps/nodes and blocks work, how to configure them, create paths and connections.
How to capture and store a user’s response?
This article provides a complete guide on capturing user responses, such as name, email, and more, and shows how to store and utilize them in your chatbot to create personalized and engaging experiences.
How to Add & Configure Text, Image, and File Messages in Studio
Learn how to send text, images, and files with your ai agent using studio.
How to Debug Flows and View Execution Logs in Chatbot Studio?
Learn how to debug your flows, check flow execution logs, and view logs within the Chatbot Studio
How to Set Up Conditions in AI Studio
Set Conditions to Understand What Information Users Are Looking For
How to create and use forms in AI Studio?
This guide will walk you through the process of creating and using forms to improve the user experience with your AI agent
